HotRod
now browsing by category
1929 Ford Model A Hot Rod
Written by Brenton Wight, Health Researcher
Copyright [c] 1999-[y] Brenton Wight. All Rights Reserved.
This site is non-profit, existing only to help people improve health.
This page might help hot rod builders.
Updated 12th February 2025
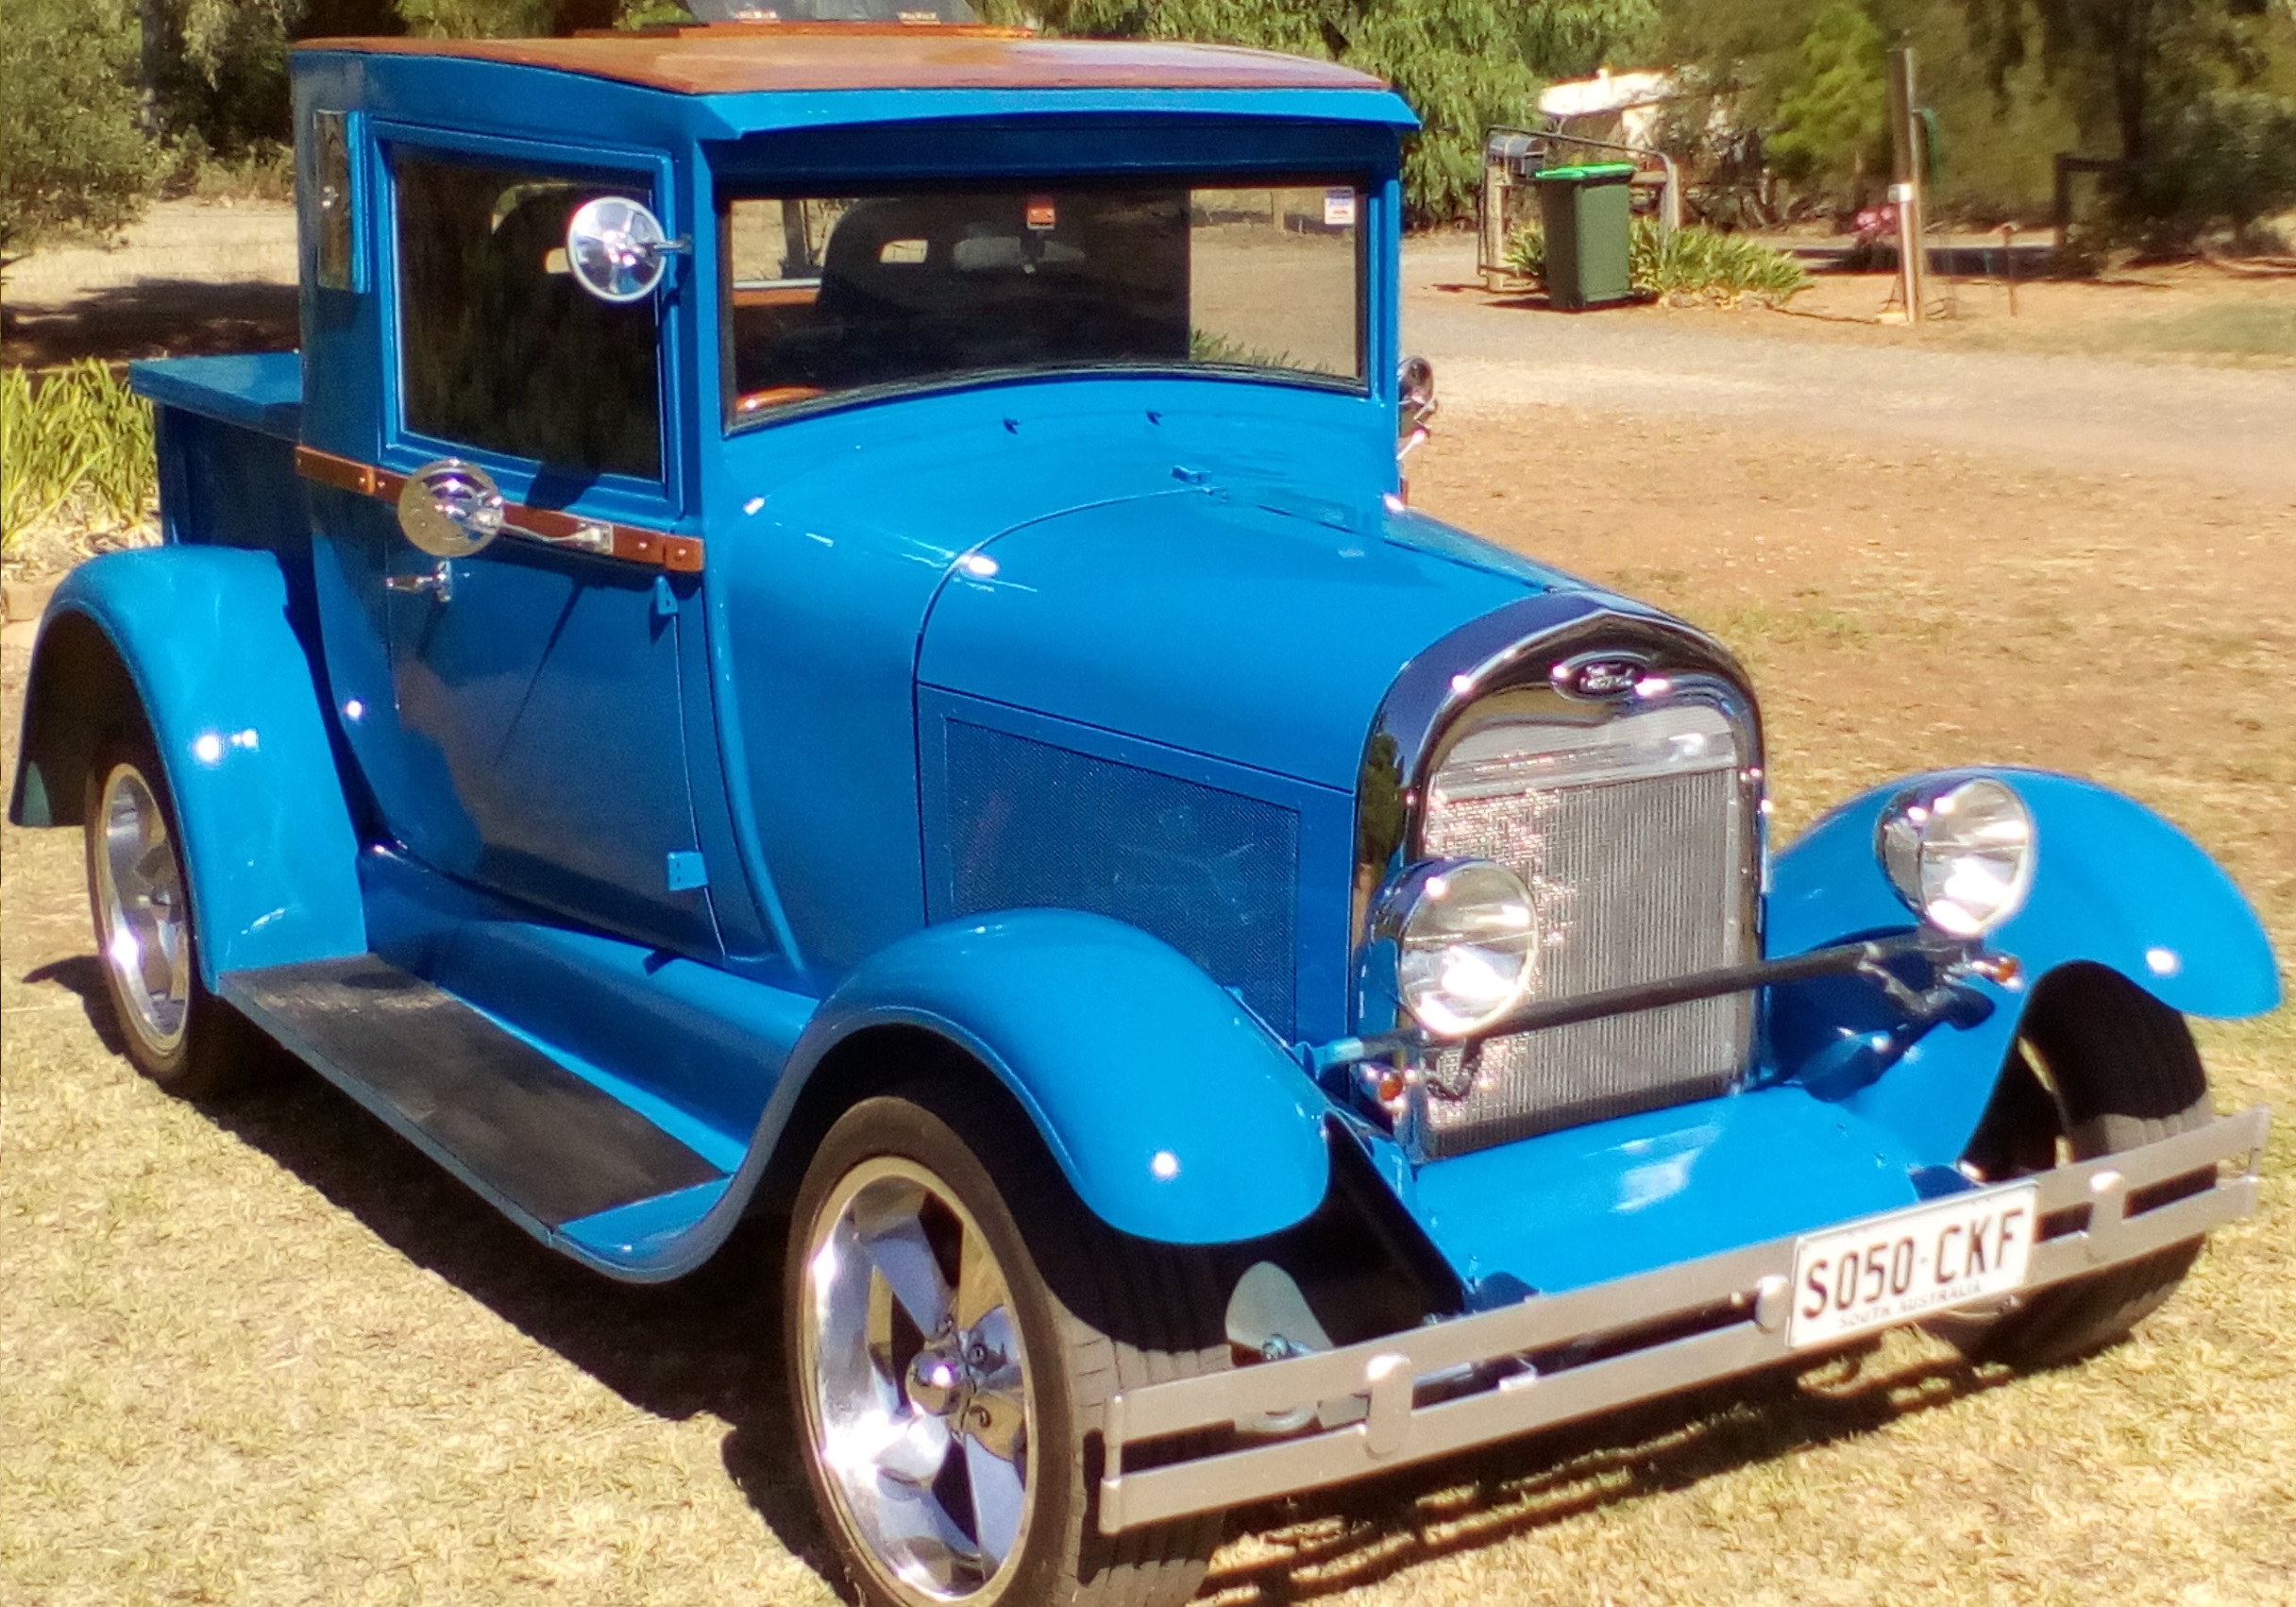
Sorry, this Hot Rod has now been sold.
This is just a “health project” that I have been building in my “spare time”.
After all, I cannot sit at this computer all day, and everyone should have a hobby or special interest apart from normal daily activities to help the body and brain to function well.
This is the start of keeping the log.
A bit late as the many previous years were not recorded as work was very intermittent.
Found some old photos so now filling in some bits of old work.
Purchased this car from a previous owner, but had to pull everything apart and start again.
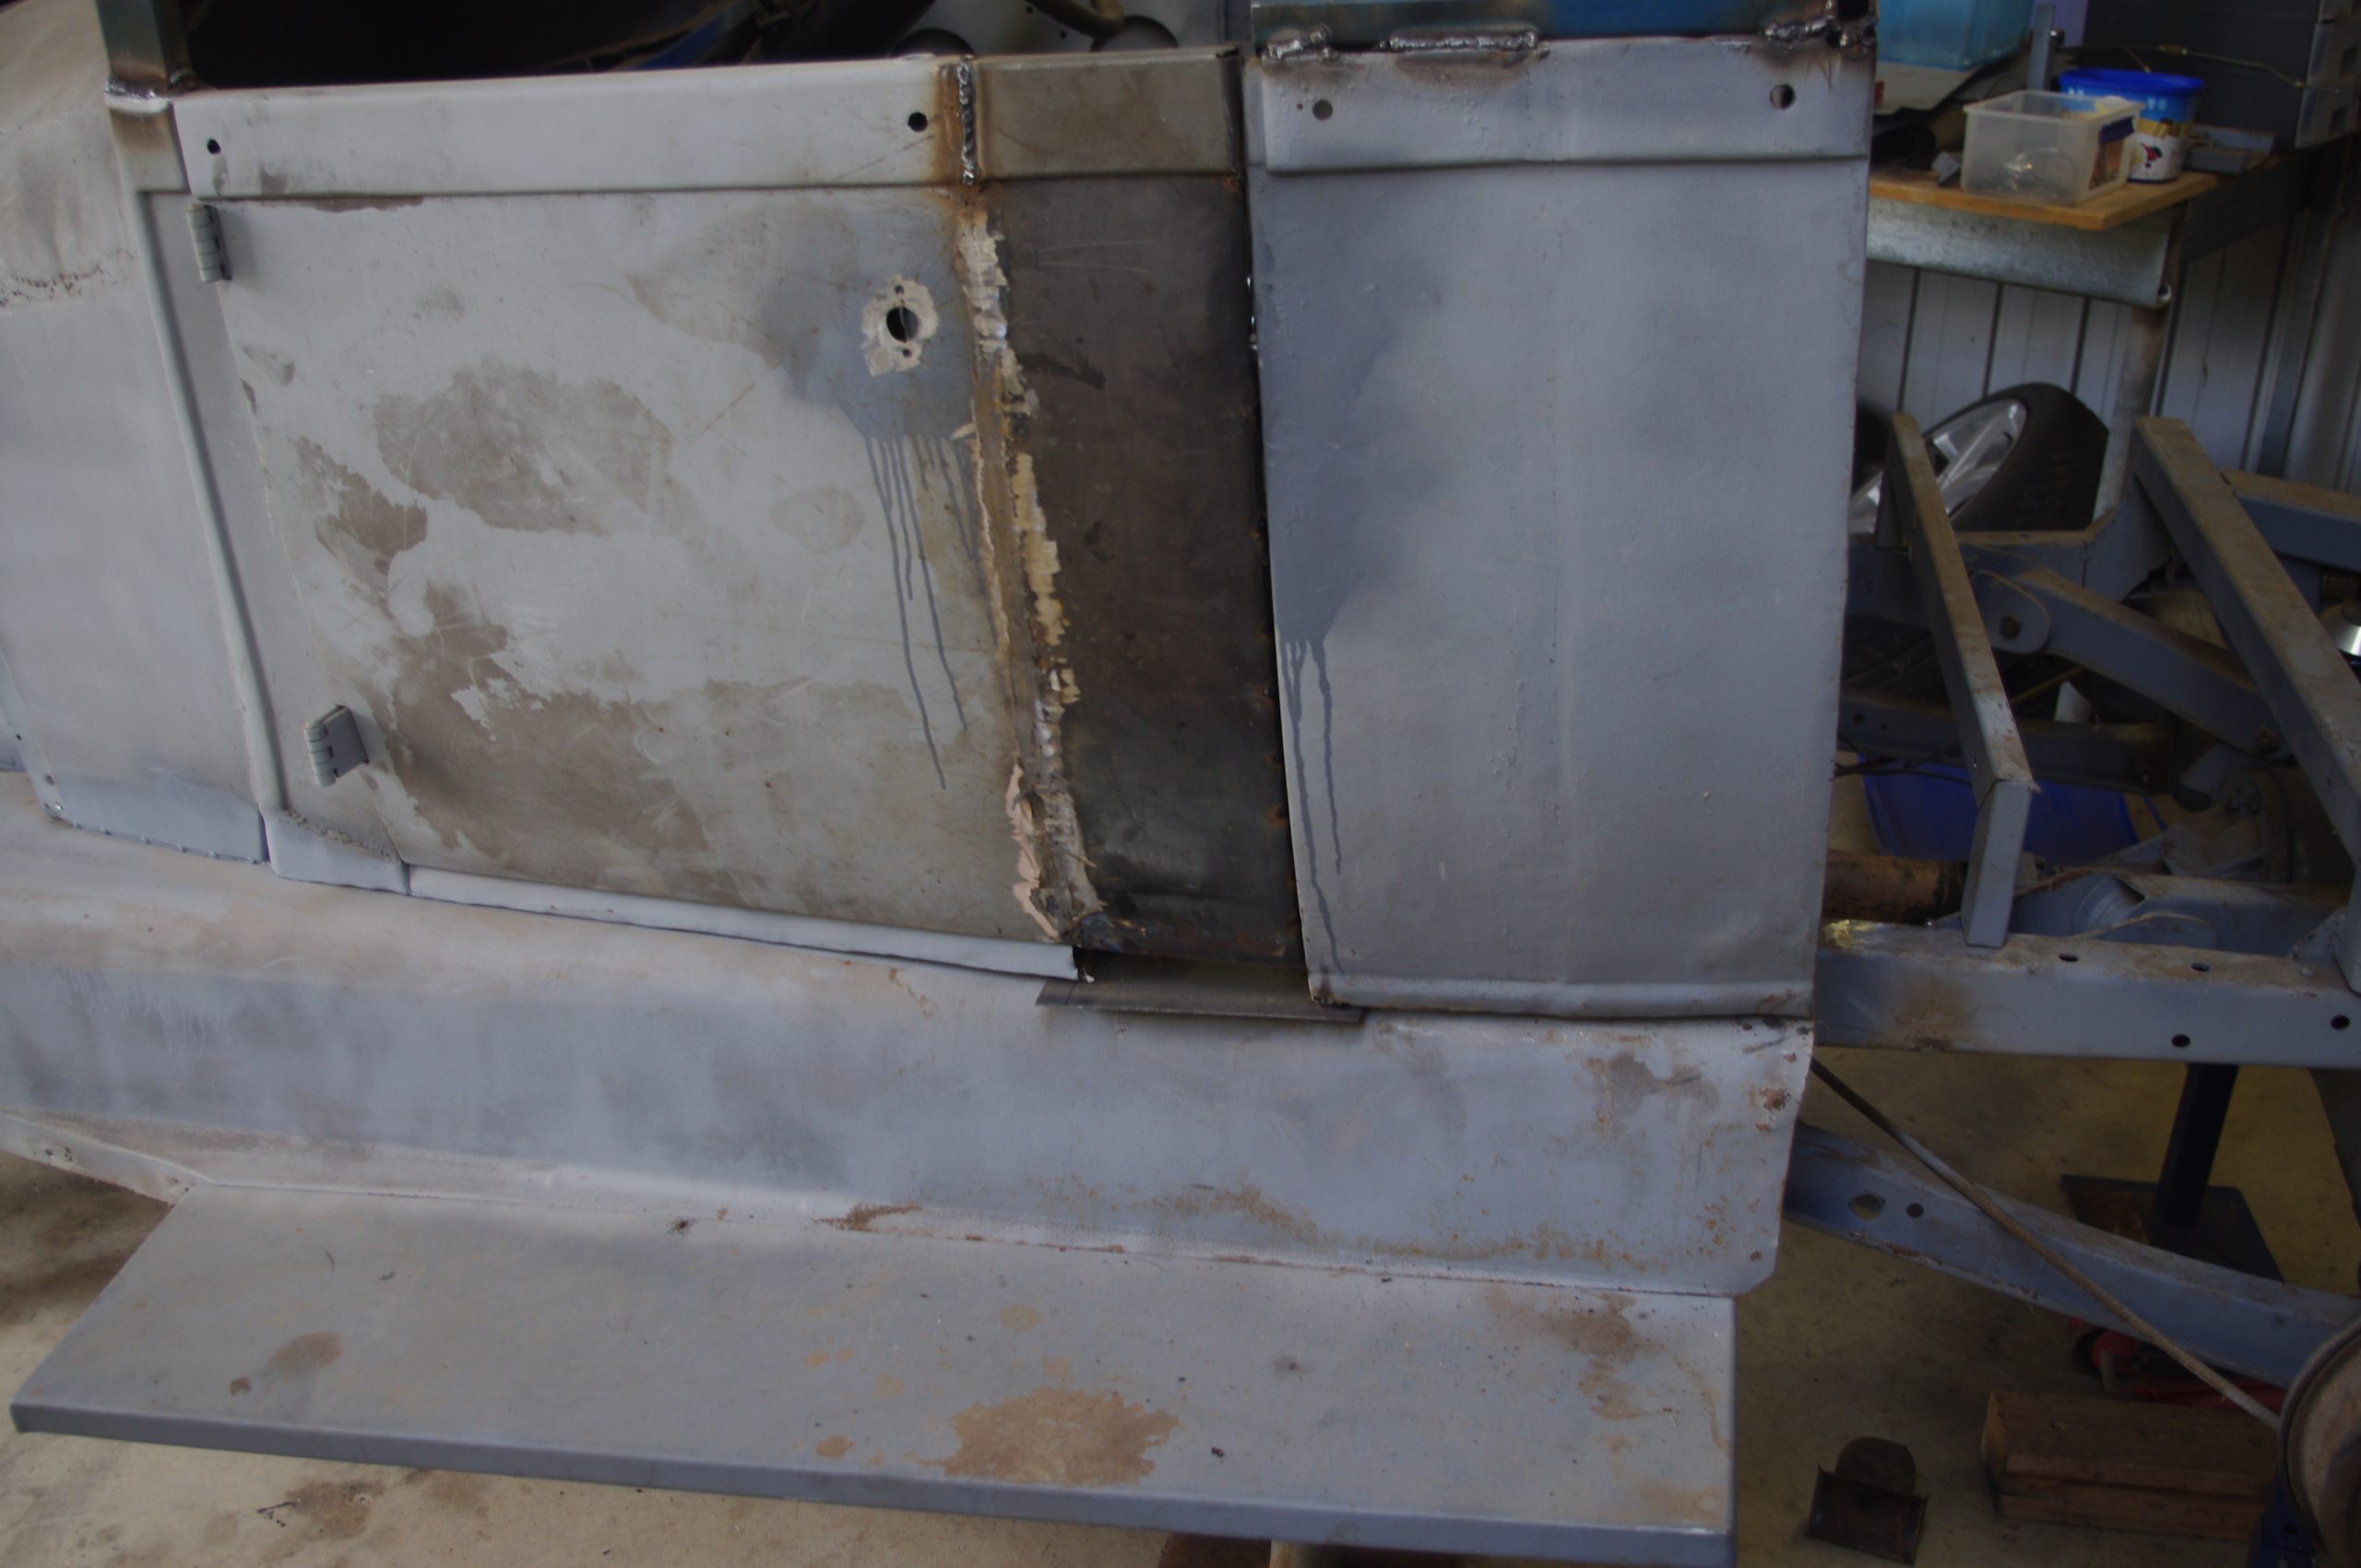
5th May 2018.
Had to lengthen the doors and the body by 150mm so I could get in and out of the car. People must have been shorter in 1929.
Pic: Left door with extension welded in.
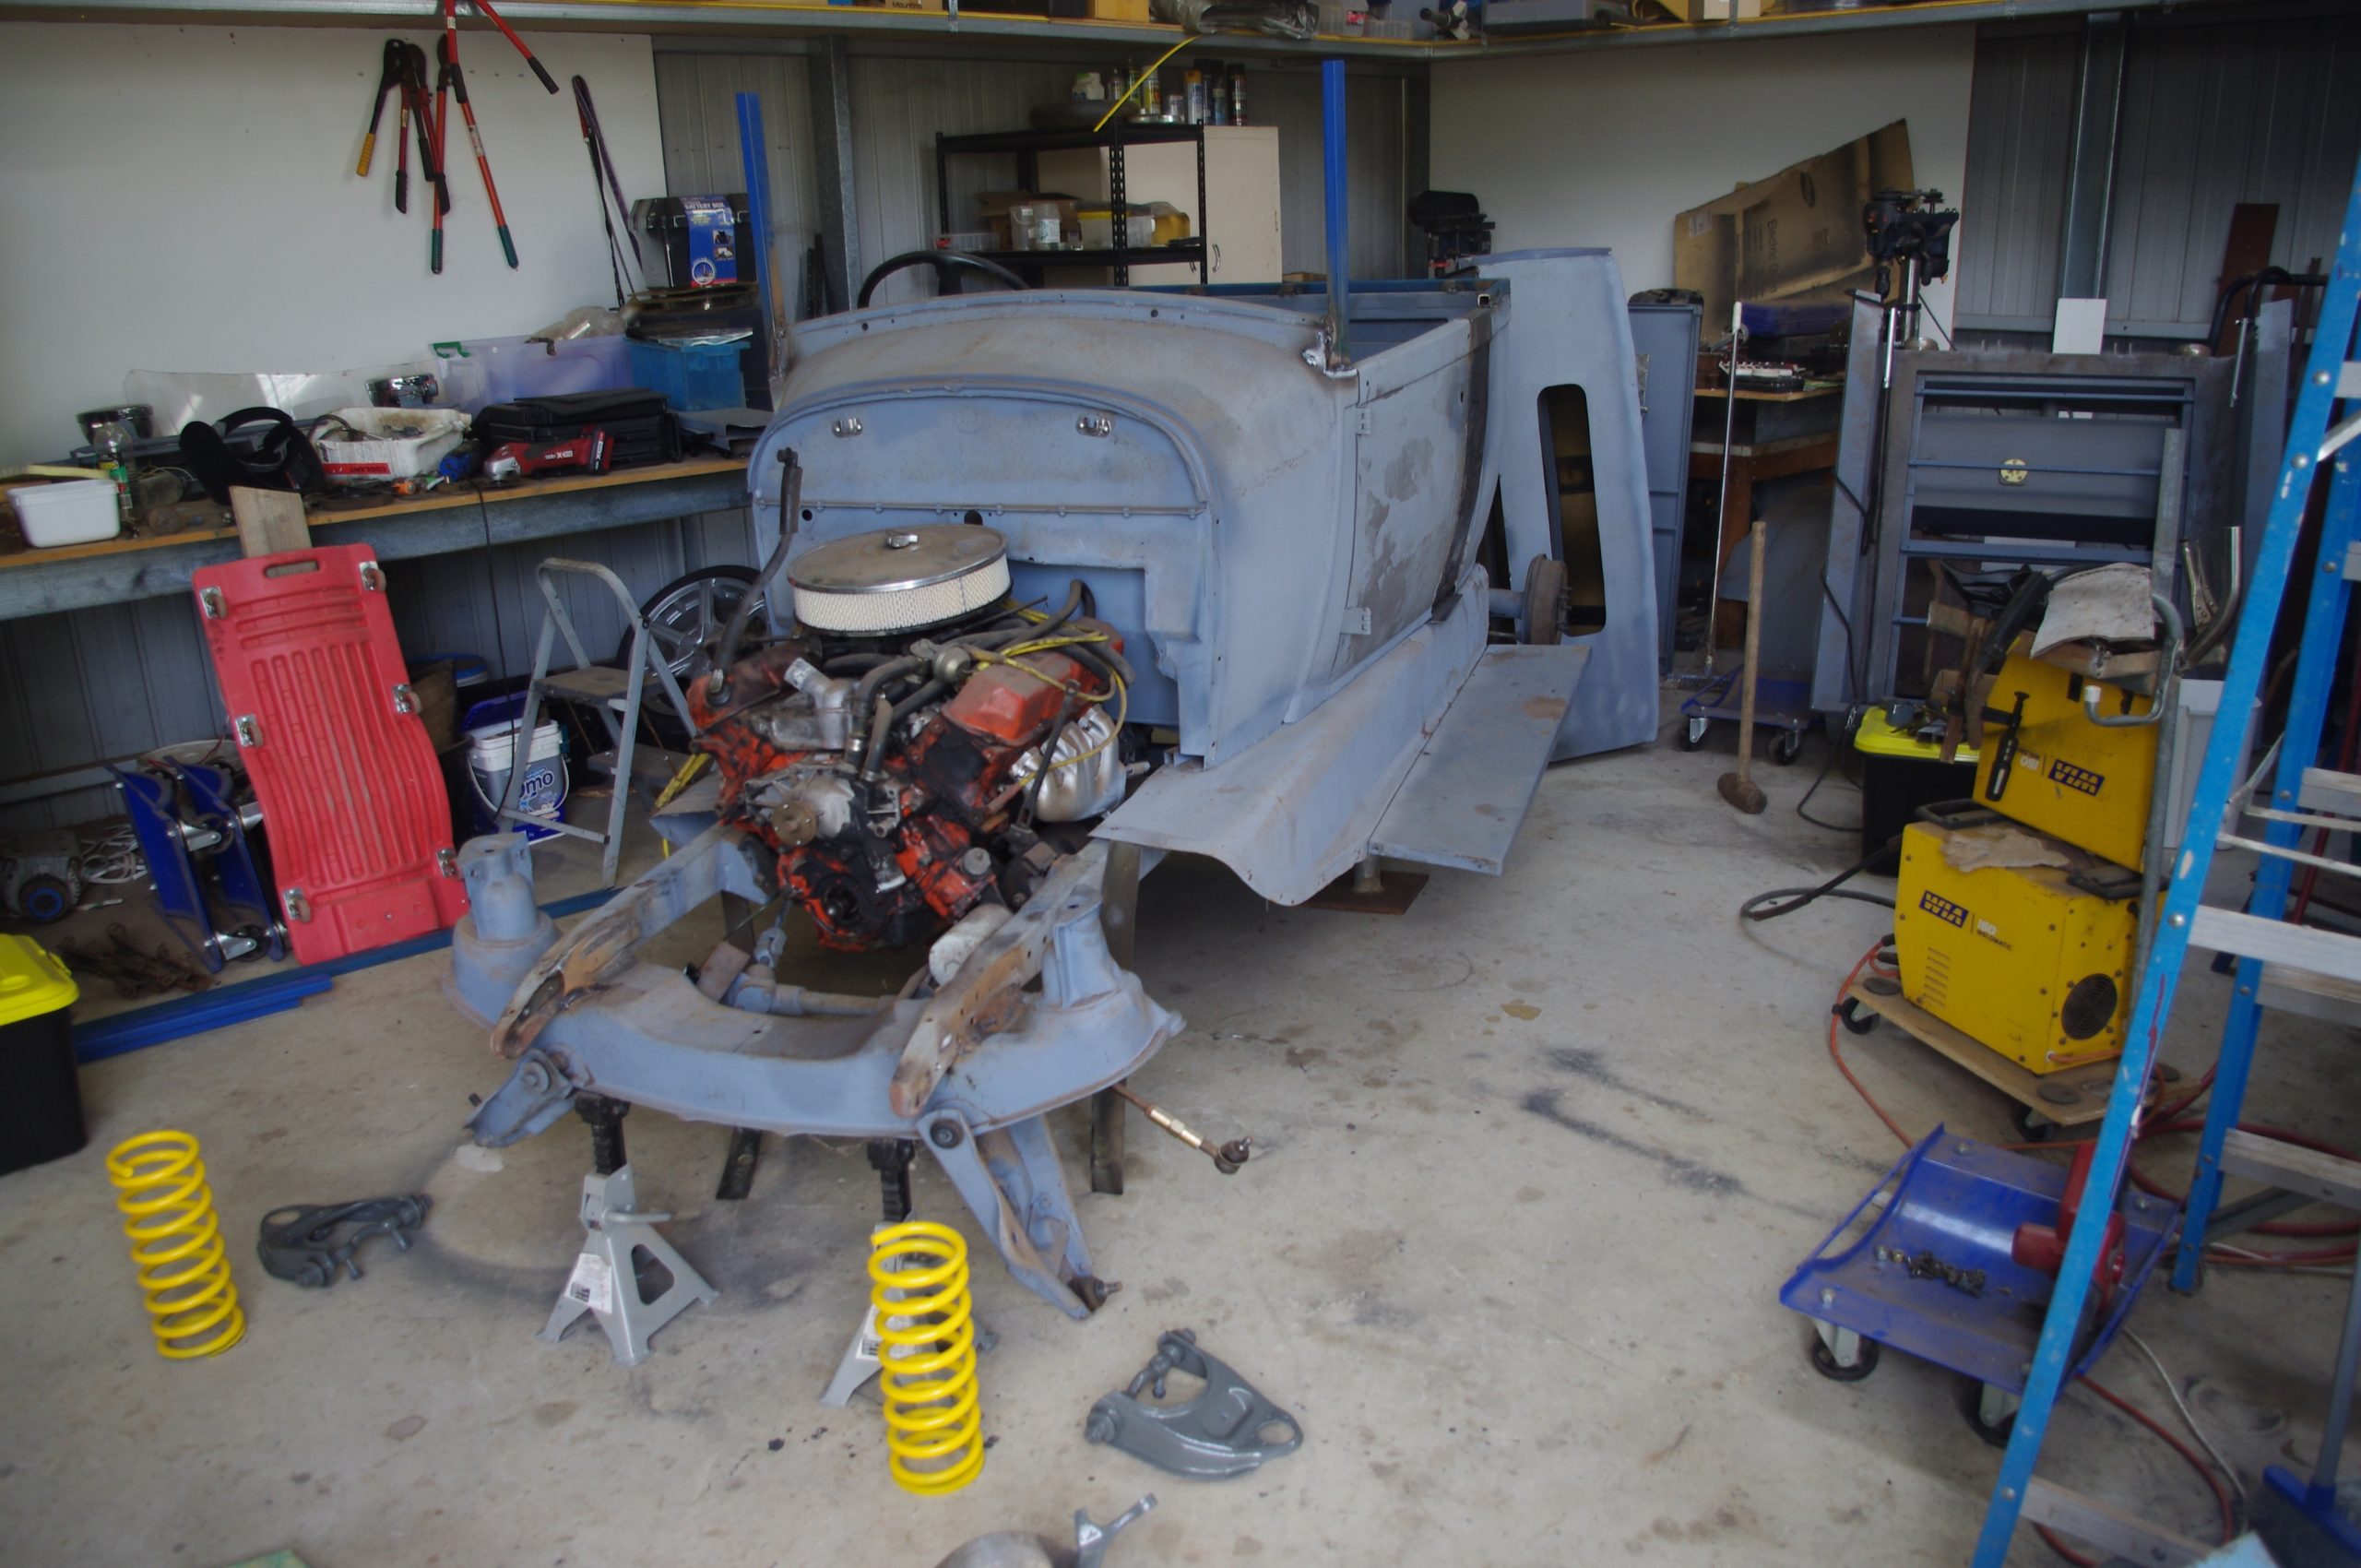
The previous owner had chopped the roof, so this was cut off, as it was too low and too short for the extended body.
New front pillars welded in more securely.
Had to find a replacement for the missing HT Holden front suspension springs, so found some FB Holden springs on Gumtree.
These appeared to be too strong, holding the suspension so high it was against the stops.
In South Australia it is illegal to cut part of the coils to lower the car, although I do not know how anyone could tell without dismantling the suspension.
Decided to wait until all of the bodywork and panels were completed before I changed anything.
Good decision, as when the vehicle was essentially complete, it was just a little too low.
Springs needed changing, pick up this story at 4th October 2021.
This has taken many years due to the small amount of time available, and was recently nearing a stage where it was capable of running on the road. However, while it was on jacks, I checked the transmission, but found I had forward gears, but no reverse. In reverse and neutral, the wheels were still running forward, which is not very practical.
My first mistake was to pull out the transmission and take it apart.
In thinking about the problem part way through the overhaul, I should have taken it off the blocks, driven it around the yard for a while, run a few 10-second stall tests get the oil hot, then see if the problem cleared itself, after all it has been sitting idle for over 8 years, and probably another similar time with the previous owner, and possibly sitting in a wrecking yard before then for a long time. The next step should have been to take some pressure tests. There is a test plug on the left side of the trimatic, and readings from all of the ranges should be compared with specifications to help diagnose where the problem may be. However, too late as it was already in bits by the time I thought about it.
It has been over 50 years since I studied Automatic Transmissions I and II at TAFE, but it is all coming back to me now, although I had no opportunity to study this model transmission.
I had studied only earlier versions such as the Borg Warner 35, Powerglide and the Hydramatic (“slushmatic”) from the EH Holden era. I can remember many things from long ago better than what happened yesterday…
Here are some of the bits partly dismantled:
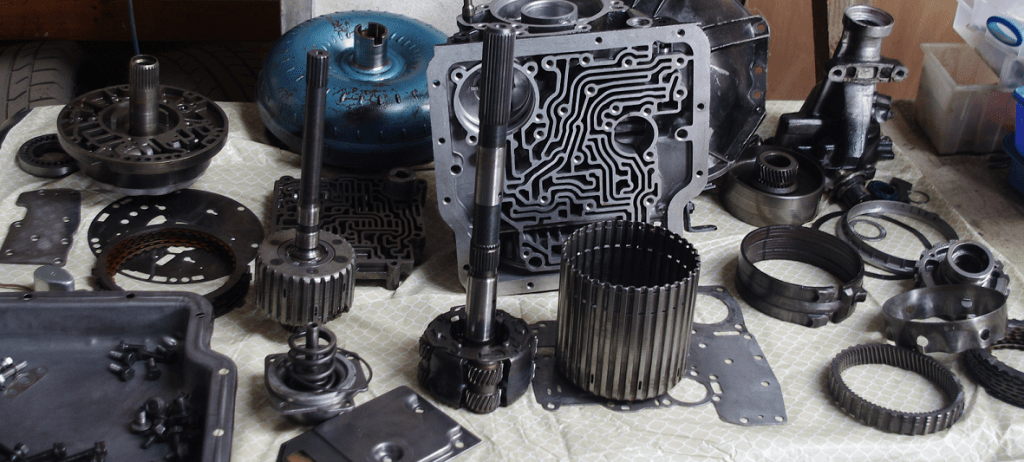
While waiting for the parts, I overhauled the valve body. Surprisingly good condition with no stuck valves, just a little gunk here and there, now cleaned, lubricated and assembled.
Other parts also in reasonably good condition for the age, about 49 years old, and has been in storage for many, many years.
Australia Post finally delivered an overhaul kit. I purchased the kit on eBay that included the band, the three clutch plate sets, the sprag (the one-way clutch), some (but not all) bushes, seals, O-rings, gaskets, modulator, kick-down solenoid etc.
Warning: These kits come with no instructions. Clutch plates are easy as they are all different sizes. O-rings, however, have no identification about what they are for, so in future one should place each old one in a plastic bag and write on the bag the correct location. Gaskets are easy enough because most can only go one way.
Rebuilt the reverse clutch where I thought there may be a problem, but found no issues.
Rebuilt the third clutch, replaced the sprag clutch, even though the old sprag clutch appeared OK.
Replaced the bushings, including the one at the back where the tailshaft is supported, where the old bush showed significant signs of wear.
There is a good you-tube set of videos on how to put together a strong trimatic auto.
Although designed for the commodore series, known as the TH180 3L30 transmissions, the basic parts for the HQ series appear to be much the same.
The transmission I have appears to be the Australian Holden-built TH180 Trimatic series 3, although I have yet to find a full definition of the differences.
The manual appears to have some minor errors, or the manufacturing has some minor changes, adding to some confusion.
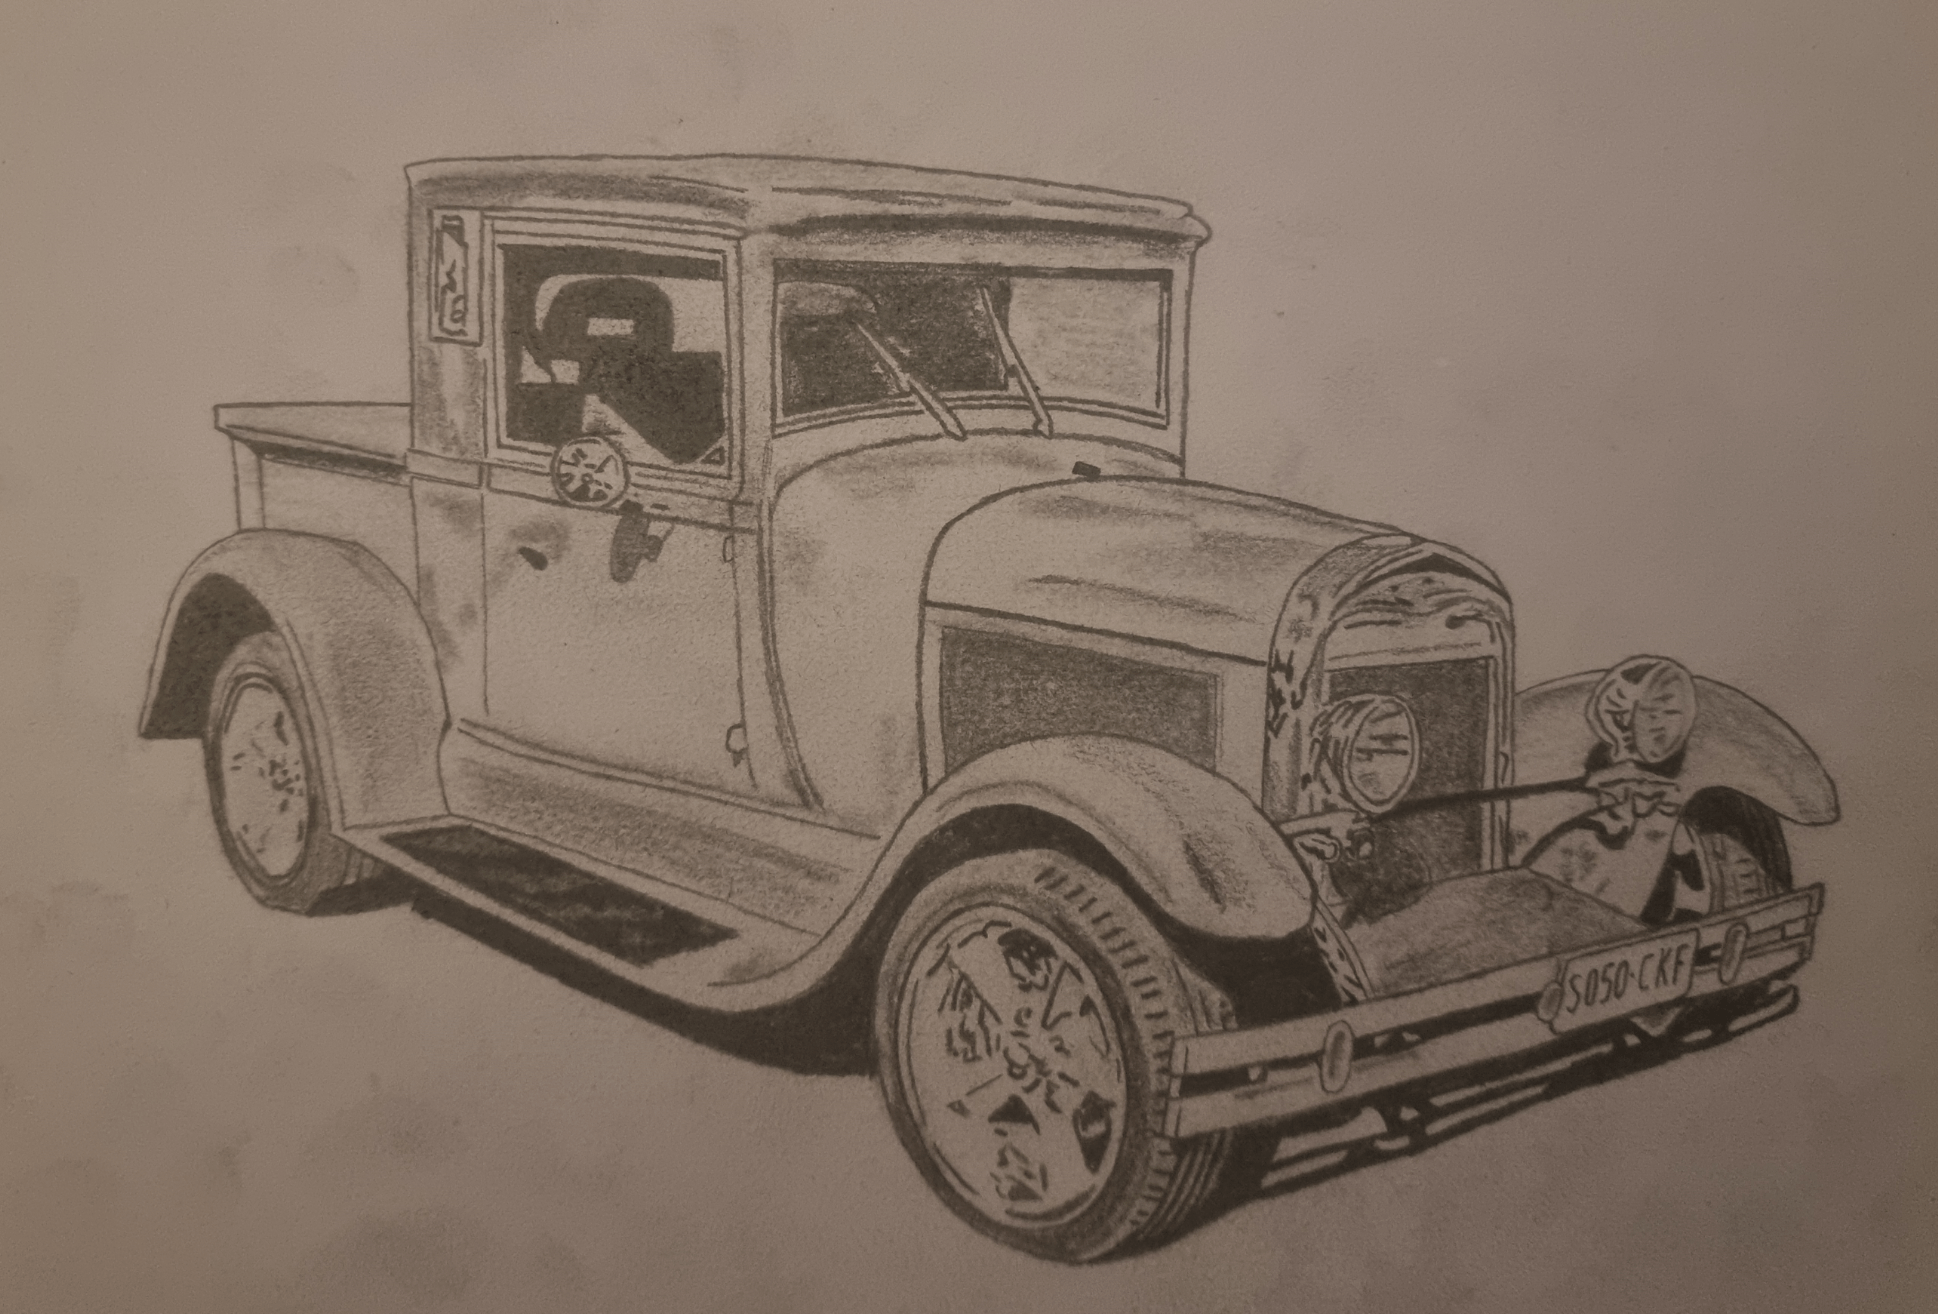
Drawing by Sam Pearce, a very talented artist and member of the Valley Hot Rodders
Because the transmission identification badge was so badly damaged, I could not read the model, only the serial number that was stamped – the model number was painted only.
Here are some videos that will help if you want to try this yourself.
Includes some tips on rebuilding a Trimatic even stronger.
Trimatic TH180 3L30 Auto Transmission Holden Commodore GM Disassembly/Overhaul Part 1 of 4
Trimatic TH180 3L30 Auto Transmission Holden Commodore GM Overhaul Part 2 of 4
Trimatic TH180 3L30 Auto Transmission Holden Commodore GM Overhaul Part 3 of 4
Trimatic TH180 3L30 Auto Transmission Holden Commodore GM Overhaul Part 4 of 4
26th December 2020.
After Christmas Day, I am happy to get back to work on the transmission.
Now completed third clutch, second clutch, band, reverse clutch.
Tomorrow I can start assembling bits into the case.
27th December 2020.
Special tools are mentioned everywhere in the manual. None were purchased for this job. Several bushes had to be replaced, and because they have very thin walls, and often have a split along the length, one cannot simply drive out the old bush with the new one. I found a few blocks of aluminium that required machining into punches that were used to punch out old bushes and press in new bushes. Internal and external circlip pliers were already on hand, but both had round ends. Rectangular ends would have made the job much easier. Inserting the O-ring at the bottom of the detent valve was difficult, but a piece of wooden dowel the right size did the job.
30th December 2020.
Finally bolted up the transmission. As it was very difficult balancing it on a jack when removing it, I welded up a flat plate arrangement for the floor trolley jack, which worked well, just rolled it in and lifted into position.
Once close to the engine and at the right height, removed the metal strap I used to hold the converter in position and bolted everything up after cutting yet another hole in the firewall for easier access to the bolts.
Tomorrow I should finish the tailshaft, rear trans mount, oil cooler lines, fit the starter motor and fingers crossed, hoping for a running transmission.
31st December 2020.
It runs! We now have reverse, although the gearshift says it should be in Second gear.
Should not be a problem, just shortening the selector arm next to the transmission.
I thought this may have been the original problem, but remembered that the selector arm was not connected before and I was carefully clicking the arm through all the gear ranges.
Another job for another day and another year (2021).
New Year’s Eve and I have had enough for one day and one hell of a year.
1st January 2021.
Great start to a great year.
Modified the selector arm and now selects all of the gears, but not tested yet.
Because our neighbors were very quiet, I assume they were still asleep or had hangovers, so I did not want to start the engine (exhaust system not finished yet) or finish a lot of jobs that required grinding or other noisy operations.
I connected the vacuum modulator hose today, added some more transmission oil, connected some wiring to the rear lights, modified a bracket for seat belts.
5th January 2021.
Installed exhaust pipes over rear axle and out the back. Still needs some adjustment to clear the rear tyres a little more.
Engine runs OK when warm, but very rough when cold, although my manual choke modification for the front 2 barrels seems to work reasonably well.
Finally got the car off the blocks and on the ground. After some lengthy maneuvering to get out of the shed, a short run around the yard was successful, although not enough speed to see how well it changes gears, but we now have forward, neutral and reverse working, and the GPS speedometer works. Of course, GPS speedometers do not work inside a shed.
Detent switch (kickdown switch) now set up at the carburetor.
The original Holden detent switch was on the accelerator pedal, but too difficult to fit one there. Now need to connect one side to ignition and the other to the detent solenoid on the transmission.
A stop was built to prevent the secondary throttle plates opening, because the original Rochester Quadrajet carburetor was behaving poorly at wide open throttle.
The front twin barrels should be more than enough.
6th January 2021.
Eventually got the twist out of the tailgate and welded the bottom hinge bracket so the tailgate now hinges and shuts correctly.
7th January 2021.
My birthday (74 years today) so not a lot done, general tidy-up.
9th January 2021.
Installed the ute lid handle, lock and tailgate connector.
Set the distributor timing. Spec says 6 degrees but engine ran better at about 10 degrees advance (slow idle, vacuum disconnected from distributor and plugged).
Despite the warning about timing and daylight savings, I can confirm that the engine runs happily regardless of daylight savings time.
I have an Aunt who never changed the clocks all year, and the roosters still wake up at dawn.
Engine overheated after idling for about 15 minutes. There was a small coolant leak, even so the small 10″ electric fan is not up to the job.
Hoping to get a 16″ or 17″ fan installed soon, along with the replacement of the thermostat and housing, heater hoses etc.
Reverse lights wiring tested and complete.
Re-wired the system so that the fuel pump switch is isolated by the ignition switch as well as the extra switch for the 12 volt fuel pump and 12 volt cutoff solenoid.
From the old carburetor days, I often had problems with carburetors flooding, so I wanted the option to switch off the fuel pump but leave the ignition on.
Completed the air cleaner modification to allow crankcase gases to vent through the carburetor to be burnt in the engine.
Verified that the alternator is now working after converting to a 3-wire system instead of a 1-wire system, and now have a red LED that should illuminate when ignition is on but not charging.
After reading the vague instructions 6 times, I realised that the 1-wire system still needs at minimum, a jumper from the live terminal, otherwise it will not charge. To get an alternator light working on the dash, we need a 3-wire system.
11th January 2021.
Reworked the right side exhaust pipes to give more clearance to rear tyre, but not happy with result, and need to think about this some more.
Measured radiator for replacement. Ordered a 19062-1964 Ford Mustang radiator that will fit in the shell, but will require an inline filler neck in the top radiator hose, on order.
Order the largest mechanical fan possible, probably 16″ or 17″ after mounting the new radiator as low as possible to allow fan clearance to the bottom radiator hose.
Decided against an electric fan as the mechanical fan will move more air above idle, and should not be idling too long.
May have to increase revs a bit if held up at traffic lights too long.
The mini-alternator has only 50 amp capacity, and up to half that required to run a powerful 17″ electric fan, along with electronic distributor, fuel pump, lights, etc.
14th January 2021.
Removed radiator and grille shell.
17th January 2021.
Replacement carburetor arrived, replica Quadrajet which is a post-pollution model, needing several hose connections blocked.
18th January 2021.
Installed the external rear view mirrors, motorcycle units from aliexpress.com that look slightly flimsy but once installed seem quite solid.
20th January 2021.
Radiator arrived.
Designed for a 1962 Ford Mustang, and slightly shorter than I would have liked, but the same core height and width as the previous radiator, but with a much thicker core.
Combined with the aluminium construction, should give almost double the cooling capacity.
Unfortunately I could not get the bottom pipe any lower, so a 16″ fan is the biggest I can use.
May need a fan spacer, but by mounting the mustang radiator as far forward in the grill shell as possible there should be just enough clearance between the fan and radiator.
Replaced thermostat and housing. Chrome housing was about $1 more than standard, worth the extra as it also has O-ring seals instead of a gasket.
25th January 2021.
The replica Quadrajet carburetor is different from the pre-pollution carburetor and manifolds, such as my HQ Holden 308 manifold, around 1972.
The new carburetor hangs over the front of the manifold, allowing vacuum that is supposed to feed the vacuum advance in the distributor now goes to outside air.
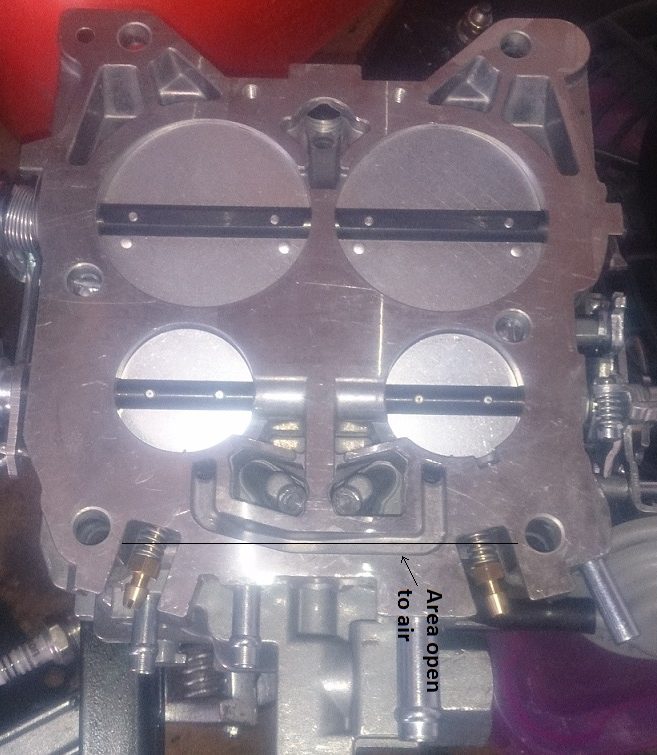
The solution: Build a metal plate between the manifold and carburetor that will block off this passage.
Carburetor now mounted with thick layer of liquid gasket between the plate and manifold, and gasket between plate and carby, stuck down to the plate with liquid gasket along with a small section of thin cardboard to replace the missing area of the gasket to cover the exposed vacuum channel in the pic above. No liquid gasket between the gasket and the carburetor as I do not want to destroy the gasket if I have to remove the carburetor again.
Connected the fuel line and started the pump, but no fuel entering the carburetor.
Removed the top section after knocking the rolled pin partly through to release the lever for the internal squirt pump.
Details on dismantling the carby here:
www.youtube.com/watch?v=8X2wsbFHibw
No petrol in the float chamber at all. Not sure what the problem was, removed the float needle but did not look at it closely enough beforehand, but re-assembled the float needle and fuel then flowed well. Either the needle was stuck (unlikely as it lifted out effortlessly) or it may have been incorrectly assembled at the factory.
Re-assembled the top half and all appears fine now.
26th January 2021. Australia Day. The Lucky Country.
Kapunda is one of the best towns in the best State in the best Country on Earth. No Covid here..
Ordered a new bottom radiator hose, as the mustang radiator had a standard 45mm bottom spout, the old one had the bottom spout the same 38mm as the top.
27th January 2021.
Rebuilt the brackets for the kickdown switch and throttle cable.
Completed the top radiator hose with the inline filler neck cap that worked out OK, as the mustang radiator had the filler neck inside the grill shell, not a convenient position.
29th January 2021.
Installed the firewall cover that gave access to the distributor clamp for setting the timing.
Installed some plywood over the lower firewall passenger side to help level out the area before carpeting and prevent too much heat coming from the engine compartment.
30th January 2021.
Installed the internal rear view mirror.
1st February 2021.
Machined a 22mm fan spacer to allow clearance between the fan and pulleys and fitted the fan.
Needed 2″ x 5/16″ UNF bolts. I have purchased that many bolts for this project it must weigh much more than originally estimated.
Finished all of the seat and seat belt anchors and installation.
Installed new transmission oil cooler hoses. The original radiator had no oil cooler in the bottom tank, so I installed a separate oil cooler alongside the transmission.
The new radiator had an oil cooler, so I re-routed the exit from the first oil cooler to the radiator cooler, and from the radiator cooler back to the transmission return line.
Second return spring and bracket added to the carburetor to comply with the rules.
2nd February 2021.
Fitted the new bottom radiator hose OK.
Clearance between the fan and the bottom radiator hose is less than desirable, but should increase under engine power as the left side of the engine always lifts under load.
Fabricated some blocks for the manifold heater connections, and re-routed the two connections from the thermostat housing to the water pump.
Modified my original manual choke modification for the new quadrajet, which has a feature of preventing the choke operation until the throttle is opened somewhat. Now need to use some care when using the choke to prevent damage to the mechanism by operating the choke before depressing the throttle. Update: No need for a choke. 2 or 3 pumps of the throttle and it starts with no fuss.
3rd February 2021.
Installed the right door lining, but first had to rebuild the linkage for the claw lock so it would not interfere with the lining.
4th February 2021.
Started the engine with the new quadrajet. No choke required, just 2 pumps of the throttle and it started well and ran smoothly, much better than the old quadrajet. Had to stop it because coolant was overflowing in the top hose filler neck. Could not find the radiator cap that came with it. Spent an hour tidying up the shed but nowhere to be found.
Will tidy some more tomorrow but may have to buy another. It will turn up one day when I am looking for something else.
5th February 2021.
Found the radiator cap. After searching the entire shed again, eventually found it sitting on top of the radiator shell in plain sight. Well, at least after kicking myself in the butt, I have a slightly more orderly shed now, hopefully making other things easier to find.
Engine ran for a while but had to shut it down due to a small coolant leak , and no transmission oil showing on the dipstick and none left in stock. Back to our Kapunda Hardware shop again for more Dexron 3 transmission oil. Originally, the trimatic was designed for dexron II oil, but when dexron 3 was released in the 1990’s it was backwards compatible with dexron II transmissions.
After our Auto Spares shop closed, much of their stock is available at the hardware shop which is very handy.
Fixed the coolant leak, then made a tee-piece with 2 x 8mm connections and 1 x 6mm connection to connect the two radiator overflows to an overflow catch-can yet to be mounted.
Heavy rain coming in, time to lock up for the day.
6th February 2021.
Family gathering in Adelaide today, so now work done.
7th February 2021.
Mounted the catch-can on a fabricated bracket.
8th February 2021.
Ran the engine for 25 minutes today to check for overheating issues.
Unfortunately, coolant temperature kept rising, although rising slower, after the thermostat opened, but when it reached almost 200 degrees F (93 decrees C) I had to stop the engine.
Part of the test time I had the transmission in gear (car still on blocks). Checked the under-floor transmission oil cooler and found it warm, but not unreasonably hot, unlike everything else around the engine too hot to touch, so the transmission oil load is unlikely to be an issue with overheating.
Although a lot better than the electric fan and copper radiator, still getting too hot.
Of course, in everyday situations, the car moving along the road most of the time will make a big difference.
But I will now build a fan shroud anyway.

10th February 2021.
Removed the brake light switch I originally spent a long time setting up under the floor against the brake pedal. The original switch simply connected +12v to earth which was not the way the rest of the wiring was configured. So the option was to order a new switch with 2 contacts, or to insulate the original switch, and that looked messy and time-consuming, so a new switch was ordered.
Started routing wiring for the brake light switch, the transmission kick-down solenoid and the brake warning light. All of these are on the right side of the car, but rather than run the wiring across the firewall, I chose to run the wiring straight down the firewall on the left side, then over the transmission to the brake light switch (yet to arrive), the transmission kick-down terminal, and the brake warning light on the master cylinder switch.
11th February 2021.
Further work on the wiring.
Started building brackets for the fan shroud.
12th February 2021.
More work on the fan shroud, but it seems almost impossible to build a shroud in 2 pieces (top and bottom or left and right) halves and fit them with the fan in the way. And without the fan installed, once the shroud is in position, the fan cannot be installed or the bolts inserted or tightened.
Also I looked at the option of building the shroud in four quarters, but there were too many issues that way.
So the shroud is on hold until I have another brainwave.
The new brake light switch I ordered was probably not the best type, so I have ordered a more suitable one. Should arrive next Monday 15th.
13th February 2021.
Tidied wiring some more underneath.
Installed switch and wiring for demister. I used a 12v demister to eliminate water hoses from the engine going through the firewall. A waste of time as without side windows, there would probable never be any mist, and this car would never be taken out in unsuitable weather.
But the rules say we have to have a demister.
14th February 2021.
Fitted the marine ply lining to the passenger side door.
Installed a blue LED light in the dash for high-beam headlights. A more prominent position than the headlight switch that was mounted on an aluminium plate just below the dash.
Installed the rear hood latches both sides.
The front latches are in the way of a bolt attaching the mudguard to the chassis, so this is a job for another day after I have slept on it.
15th February 2021.
Brake light switch still not arrived. Actually had arrived, but the only person who knew anything about it was away until tomorrow.
Tidied the hand brake cables where they pass over the rear suspension control arms. Easiest way was to use a large hose clamp to hold the cable outer firmly, and this worked well.
16th February 2021.
Brake light switch arrived yesterday, and now the right person unboxed yesterday’s delivery, and proceeded to set up the product on the computer system so they could sell it to me. After a while, I had it in my hand. For a $14 product, they went to a lot of trouble to get this part for very little financial gain, so I cannot complain.
Unfortunately, this switch did not come with a nut on the white plastic thread to hold the switch in place. On reviewing the part image online, it seems that is how they come. No problem, I thought, I have a wide selection of metric and imperial nuts, bolts, taps, dies so I can fit almost anything. However, this turned out to be a non-standard thread. Smaller than 12 mm metric, bigger than 7/16″ imperial, but the close to the same pitch as a 12 mm x 1.25 mm pitch metric thread. I happened to have a rusty old wheel nut with this thread, and a thread tap to suit, so cleaned it up, cut in half as the tapered section was too long, and squeezed in the vice in 3 directions to attempt to close it in to the right size.
This partly worked although still too loose, so I assembled the switch on a revised bracket with some tough adhesive I had used successfully before, and left it to set for the next day.
17th February 2021.
Adhesive on the brake light switch looked OK, but decided to leave it for another day.
I wanted to build a cover for the chassis section in front of the radiator, hoping that this would direct more air through the radiator rather than underneath it.
I had run out of sheet steel large enough for this job, but in my stockpile of old appliances, found a washing machine side panel that was plenty big enough. Cut to size, drilled for 2 bolts each side, rolled the edges front and back, curved the panel to match the chassis, painted undercoat, then black gloss, and installed with stainless bolts. Pleased with the way it turned out.
18th February 2021.
Installed the brake light switch assembly and completed wiring for the brake light switch, brake fault light and transmission kick-down solenoid.
Built a kick-panel passenger side and fabricated a “glove box” to go above the kick panel.
An offcut from the other side of the washing machine above served as the metalwork. Cut, folded, pop riveted the box and painted gloss black.
This keeps feet and obstacles away from electrical terminals, and hides the rat’s nest of cables under the dash. Tomorrow I should fix some brackets to support the glove box and kick panel correctly.
19th February 2021.
Built brackets for glove box/kick panel support.
Installed, stain and varnish the timber strips around doors, stained and varnished the marine ply inside door panels.
Worked out how to build partial fan shroud and started laying out materials.
20th February 2021.
Built components for fan shroud in 4 main pieces covering about 65% of the fan, mainly at the top where the radiator is hottest.
Insulated and carpeted the floor, passenger side and central.
21st February 2021.
Painted and installed fan shroud components.
Ran the engine and pleasantly surprised by the effectiveness of the partial fan shroud,
Even with the engine idling, a significant blast of air felt behind the fan, where before there was no significant air movement.
Drove around the yard for a while, and the engine temperature rose to 185 degrees F and remained stable at that point, which is encouraging.
The Tridon TT1-190 thermostat is rated at 88 degrees C (190.4 degrees F) so I assume may not be fully open at 185 degrees F.
23rd February 2021.
Removed mudguard bolts and installed the front hood catches.
Ordered new long, round mufflers and flexible stainless tube to go around wheel arches, allowing greater clearance to tyres.
Ordered some bends to make the exhaust neater between the new mufflers and the flexible stainless tube.
25th February 2021.
Needed to resolve poor oil pressure with a hot engine. It idle, oil pressure on the electronic dash gauge was showing zero pressure, but with a good mechanical guage screwed direct into the oil pump, pressure was actually 5 to 10 psi at hot idle, rising to 20 to 30 psi at revvs.
Today I drained the oil, which was 10/40 for running in the engine, and replaced it with Penrite 40/70. Noticeably thicker, took a long time to drain from the rocker cover into the sump.
However now we have 30 psi at idle, still dropping to around 10 psi when hot, and going up to 50 psi at revvs. This oil also contains zinc and molybdenum for better lubrication.
This is all with a new hi-flow oil pump, and a rebuilt engine with new pistons, rings, crank and big end bearings, still tight because of the limited time it has been running.
I did not replace the camshaft bearings during the rebuild as they looked OK, but in retrospect perhaps this was a mistake, as I cannot see where else the oil pressure is going, apart from some slight wear on the crankshaft journals.
Ordered rear suspension bump stops, not as high as the previous stops, allowing more travel upward.
26th February 2021.
Carpeted the glove box to tidy things up and eliminate some sharp edges.
28th February 2021.
Re-arrange and tidy the shed to allow more room to update exhaust system next week when all parts should arrive.
2nd March 2021.
Exhaust gear arrived. Two 30″ long x 2 1/4″ mufflers and two lengths of 2 /14″ flexible stainless steel to run around the inside of the rear mudguards, and some extra 2 /14″ tube bends. Also received a device to expand the tubing to the allow lap joints, but it does not work very well. I used the medium-sized tool first, but stripped the thread attempting to expand a 2 1/4″ exhaust pipe. Next, tried the largest tool in the kit, flooded it with oil (essential) and managed to enlarge the tube by 1 mm. As I wanted to increase the size by a few more mm to cover the outside of the flexible stainless tube, I cut 4 slots in the tube first (so that when the exhaust clamp tightens it will give a firm grip) and then the tool easily expanded the tube. Then assembled the joint with a smaller tube inside the flexible tube and the larger tube over the flexible tube, which worked reasonably well, but time-consuming and a little fiddly and untidy.
3rd March 2021.
Designed, built and installed a swivel bracket to support the rear end of the long muffler.
Seems to work well, allows some movement to allow for the engine moving under load, but controlling the height of the muffler and stopping excessive sideways movement so it will not knock on other frame members. Although there is no rubber involved, I do not expect undue vibration to be transmitted to the frame or body.
Designed another bracket at the top of the wheel arch to support the flexible stainless exhaust tube, and that worked well, so built another bracket about 60 degrees rear from the top of the arch.
Fabricated a length of 2 1/4″ tube with a 60 degree bend to run from the end of the flexible tube to the rear muffler.
Will see how that works tomorrow.
4th March 2021.
Used a different method of joining these tubes. I used a smaller tube welded to the 2 1/4″ tube to allow the flexible stainless tube to fit over the smaller section, then a standard clamp over the stainless tube. This was the way I was going to do this originally, but I thought the clamp would damage the stainless tube, as it is very thin-walled.
However, all worked out well, and the left side is now complete, and started on the right side today. Much faster now I have the method OK.
Also changed the rear bump stop, much more difficult than I originally thought as I did not remember how the bracket was assembled, but got there in the end.
Ordered a new starter motor, original unreliable unless the battery is absolutely fully charged.
5th March 2021.
Completed replacing the right rear bump stop.
Hoped to complete the right side today, but time limited. Completed the first and second bends around the wheel arch, and part of the last bend and rear anchor.
6th March 2021.
Completed the right side at last!
Still a few small cosmetic things to tidy up, but ready for road testing.
Aim to start next Monday 8th if I can get a temporary registration permit online.
7th March 2021.
Built and installed the left door strap to stop the door from hitting the mudguard.
Prepared some parts for the right door.
8th March 2021.
Today I wanted to check the wheel alignment again, now that the weight is somewhere near final, but never got around to it.
First, I completed the leather strap on the right door to prevent it from hitting the mudguard.
Then I wanted to check the primary jet size in the new quadrajet carburetor, as the exhaust is still showing richness – black smoke, soot in the exhaust pipes, even with idle jets completely closed.
So off with the air horn section, and thought the float level was slightly too high, so bent the float lever a little and checked the level again, perfect at 5/8″. Electric fuel pumps are best for these jobs.
Then I looked at the jets and the rods that hang in the jets.
These are the front (primary) ones, not the rear (secondary) ones.
The original carby has number 72 main jets, but there was nothing stamped on the new quadrajet. The jets were smaller, and the rods were thinner than the original, so swapped the new jets and rods with the old ones and hoped that they would work in the new carby. Will finish assembly tomorrow.
9th March 2021.
Finished assembling the Quadrajet today.
Engine is now idling a little faster and smoother with the idle screws just 1/4 turn out from bottoming.
I decided to leave the faster idle as is to ensure a good flow of air through the radiator, and is not fast enough to “clunk” the transmission when engaging a gear.
No black smoke evident if engine revs are increased slowly, but flooring the pedal blows a heap of black smoke.
I am hoping that this is because the Quadrajet squirts in a lot of fuel, mainly as the secondaries open, to avoid flat spots, but a road test up a long hill will show any black smoke under constant load.
Checked the wheel alignment again and looks good.
Considered increasing the caster because the steering is so light, but will wait for the road test in a sealed surface before I change anything.
10th March 2021.
The new starter motor arrived today, but fairly late.
Supposed to be for a HQ Holden 308 engine, but I am not sure if it will fit.
The bell housing cover plate appears to get in the way, too low, and fouls on the boss of the business end of the new starter motor, which is somewhat smaller than the original.
The bolts for the original are too long so I will either get the correct bolts tomorrow or pack them with a heap of high-tensile washers.
This was an original cover and had been battered around but straightened.
Tomorrow I will attempt to move the cover up at least 7mm, but if this cannot be done easily I will attempt to cut a piece out for clearance.
11th March 2021.
Completed the starter motor replacement today, also ordered some lexan for the future side windows.
The starter did not work at first. The new starter needed more current for the solenoid, so I traced the wiring back to the relay and found it was not connected.
Too hard to work under the dash, so I installed a new relay on the firewall, and all works well.
The new starter was physically smaller than the original, and I resorted to removing the bell housing cover plate and grinding the starter boss opening so the starter would not foul the plate. Starter bolted up OK this time and now working reliably (so far).
12th March 2021.
Temporary registration obtained online for 3 days, cost $69, starting tomorrow, 13th March.
13th March 2021.
Road testing!
All ready for the road test, but as soon as the engine was started, a loud noise issued from somewhere in the engine/transmission.
Did not sound like the water pump as the would normally rumble before failure, but this was a metallic, scraping sound.
The last work on the car was the new starter motor, and the issues with the bell housing bottom cover meant the starter had to come out and also the cover. On inspection, the cover had a very small mark near the crankshaft area, and I was surprised that it would have made so much noise. However, some more cutting away of the central area of the cover resolved the problem. All assembled again and no noise.
Now the road test. All fine except a slight noise on overrun and I was worried that the transmission still had problems. Also the GPS speedometer suddenly stopped working after a short distance.
However, the car ran very well up to about what I thought was approaching the speed limit, no noticeable vibration and driving straight and true, except that the noise on overrun was more than slight, getting louder, so back to the workshop.
Checked the speedometer wiring, all looked good, power wire had 12 volts, light wire had 12 volts, earth wire had zero ohms to earth, Plugged the wires back in wobbling to ensure they went all the way.
Turned my attention to the overrun noise. I began to think that this is the sound a differential makes when it is on the way out.
Then it clicked! About 2 years ago, when I was building the rear suspension, I thought I should check the rear axle oil level, but I did not have the right socket size to undo the plug, and other spanners were just rounding off the very flat plug, so I left it, and over time forgot about it, until TODAY!
Now I had the right 6-sided heavy duty 1″ AF socket, and unscrewed the plug with my nut-runner, and of course found the axle housing almost empty of oil.
A little mist, that’s all, so there must have been a tiny bit there somewhere. No hardware/auto shops open now, so a job for tomorrow.
While the back was on blocks, I adjusted the rear brakes and they are now more equal in braking force.
14th March 2021.
Purchased 85W /140 Diff oil today, hoping that damage to the diff will not be too severe and that this heavier grade will help.
Filled the diff and road testing was great! Not a sound in overrun conditions, so very happy.
Engine slightly rough, so replaced 4 spark plugs and cleaned some others, and the engine is running smooth again. All plugs were sooted up from the previous rich conditions, the worst were the original plugs that would have been dirty before anyway. Will get a complete new set tomorrow.
The original HQ Holden ignition key was extremely worn and had been bent and straightened, so Peter at Kapunda Hardware did a great job of cutting a new key that actually worked very well. I was always concerned that the old key would end up breaking in the lock.
Speedometer still not working with the engine running, but finally found the problem. It used to work OK, but recently would find the satellites OK, but then fail to work as soon as the engine was started. At first I blamed the electronic distributor, but then remembered that the 50 Amp mini-alternator was not charging earlier because of a missing jumper, and now it was working, so that must be the problem, even though the alternator was charging the battery at 14 volts, and the speedo had a specification: Input voltage 9 volts to 32 volts. However I sold my oscilloscope many years ago, but guessed that there was some ripple that was upsetting things. A web search found a possible solution, use a 3mfd capacitor to take some ripple out of the alternator output, or use a voltage regulator. I wired the speedo power to a completely separate battery, and the speedo then worked fine with the engine running. Not a viable solution, so I found a 7812 voltage regulator chip in my electronics box, soldered it in the power supply lead to the speedo, connected the earth, and problem solved. The chip ran quite cool, no significant heating, so the speedo obviously does not use much power.
Further road testing was fine, and with one more day on the temporary permit, will try to get some lengthy testing done.
15th March 2021.
More road testing today, but no time left for longer trips.
Started work on the side window frames. Lexan material due here by the end of the week.
16th March 2021.
Organised AHRF TAC inspection for Thursday morning 18th March.
Started building timber door tops. Need to complete these before finishing the side window frames.
17th March 2021.
Started building some pivot hinges for the side windows. Dropped the idea of hinges.
Replaced all 8 spark plugs. All existing were sooted, obviously still running too rich., but not as bad as before.
Will try to get some larger needles for the carburetor.
Noted that with the engine running, the brake pedal does not quite return to the top position, so the brake lights remain on.
Attached a bracket to the bell housing and a spring from the bracket to the clevis pin, and problem solved.
18th March 2021.
AHRF (Australian Street Rod Federation) TAC (Technical Advisory Committee) Inspection!
Thanks to Tim Harris and the Kapunda Men’s Shed, allowing the inspection on the hoist at the shed.
No serious problems, just a short list of relatively minor things to tidy up.
Bought some reflectors a year ago, but they have disappeared in my shed, then forgotten about, so bought some more and installed them today.
Ordered a few parts that I needed:
– Steering column lower retainer and bearing
– Front lower control arm lower inner bush kit
– LPG Safety cut-out switch, for petrol cut-off solenoid
– Tie rod end
Parts should arrive in a week.
Tie rod end had a split boot. Was brand new 8 years ago, but the boot deteriorated over time (maybe also got hit with some welding sparks). Could not find a boot to order, so ordered the whole tie rod end.
The rear lower control arm bushes on the front suspension need replacing when the parts arrive.
Will need to align wheels again.
The steering column lower bearing was slightly loose, and will be replaced when the part arrives.
The universal next to the column was also very slightly loose, but a squeeze in the vice fixed this easily.
Fixed the light on the transmission indicator, had a broken wire inside the column.
Need to adjust brake hose alignment at calipers to prevent touching the upper control arms.
I thought I had already done this, but that was when the car was jacked up with wheels hanging, and slightly different geometry when the car is on the ground (or hoist).
Will improve the battery tie-down soon.
As soon as these jobs are completed, the next inspection stage will be:
Vehicle Identity Inspection, DPTI (Dept for Transport, Planning and Infastructure) where they will record the chassis number and engine serial number on form MR29.
Next, the Vehicle Inspection, DPTI again, where an Interim Certificate of Exemption should be given, which will give the ability to then register the vehicle immediately. (Club rego or full rego).
Required for this inspection: Statement of compliance, MR29, and tools to remove the wheels so that drum-to-drum and track measurements can be verified.
19th March 2021.
No time today, too many things to do for other people, but picked up some better ear muffs from Bunnings.
20th March 2021.
Our 50th wedding anniversary today – so NO WORK ON THE HOT ROD!
21st March 2021.
Completed the improved battery tie-down.
Valley Hot Rodders meeting from 4:00 pm.
22nd March 2021.
Started removing the lower control arm bushes while waiting for parts, but fairly difficult to move them.
Too busy with other jobs to complete this today, and the next few days.
25th March 2021.
Received and installed the lower steering column bearing.
Received the petrol cut-off switch. This one either surrounds the alternator wire and detects the pulses, or uses the tachometer terminal on the electronic distributor.
I chose the latter to keep the wiring short and simple.
When no pulses are received, the fuel cuts off as it assumes the engine has stopped.
In case of an accident where the ignition is still on, the solenoid cuts off the fuel supply when the engine has stopped. When starting, the cut-off switch still keeps the solenoid open for 1 or 2 seconds to give enough fuel for starting.
26th March 2021.
Installed and tested the cut-off switch today.
Finished removing the rear lower inside front control arm bushes.
Not an easy job, but made easier by cutting a 20mm long section of 1″ water pipe, cut in half and used between the bush and the cross member. A hit on the control arm loosens the bush, and pinch bar each side then wiggles the bush out.
1st April 2021.
New bushes arrived, but not so easy getting the bushes installed.
Would be a lot easier removing the lower control arm and using a press for this job, but that is a lot of work.
Started making a tool for this job, but ran out of time again today.
2nd April 2021, Easter Friday.
Rebuilt the special tool, but need a longer 3/8″ UNF bolt to complete the job on the left side.
Requires 2 x bolts and nuts behind each side of the control arm so the arm does not get bent during this installation.
Will get a bolt, preferably a set screw tomorrow, nothing open today.
3rd April 2021.
Finally got the right bolt and finished installing both control arm bushes.
Re-mounted the steering rack, installed the tie rod end, adjusted the toe-in and checked the camber.
4th April 2021.
Re-installed the steering shaft and bled the brakes today.
5th April 2021.
Wheels back on and down on the ground, ready to go as soon as I have the DPTI Identity Inspection appointment.
6th April 2021.
DPTI Identity Inspection carried out at Nuriootpa Police Station.
7th April 2021.
Cleaned spark plugs, as late yesterday there was some rough low-speed running, possibly caused by sooting. Slight sooting found, but half the insulator was brown, suggesting the rich condition is not as bad as I thought.
Pumping the throttle still blows black smoke, but normal speed driving should be OK.
Idle mixture screws are fully closed, and normal quiet driving appears to run mostly on the idle mixture.
Accelerating or going up hills means the throttle is open wider and then fuel is metered through the primary rods/jets combination.
I will still look at using larger primary rods and adjust the power pump.
Booked the DTPI Vehicle Inspection for Angaston, but may be delayed as the officer only comes every fortnight. Waiting for a call back to confirm a date, time and location. Another $288 paid for this service.
11th April 2021.
Built a window frame for passenger side and welded to door.
12th April 2021.
Built an inside release for door.
Started fitting angle to window frame.
I intend making the left window fully fixed.
When I fit the right window I will make some sort of vent to allow cool air in the cabin, as a lot of heat comes through the firewall.
13th April 2021.
Finished fixing angles to left window frame, made template, cut and installed the 3mm lexan.
Cut and installed a 10mm meranti spacer under the frame, and gave the frame 2 coats of blue after first using up some cheap white paint.
Unfortunately the white bled through the blue on the first coat, and as I was applying the second blue coat, the white underneath was starting to bubble up, so a lot of scraping and cleaning got rid of most of it, then a new coat of blue.
Will tackle the paint again tomorrow.
14th April 2021.
Confirmation received for the DPTI inspection – Friday 23rd April at Noon, KADS Truck and Diesel, Heuritsch Road, Angaston. Would have preferred it sooner, but gives me more time to complete the side windows.
Started the right side widow:
Set up the interior door release, same as the successful method used on the left side.
Tack welded the window frame directly to the door top.
I will place a spacer at the top instead of under the frame.
15th April 2021.
Welded the frame properly to the door top.
Fitted the supporting aluminium angle and cut the 3mm Lexan sheet to size and installed.the window.
Painted the frame and angle parts. Looking fairly good now.
16th April 2021.
Cut a timber piece to reduce the gap between the right door top and roof.
Screwed into place and painted blue.
18th April 2021.
Cut a timber piece to reduce the gap between the left door top and roof.
Screwed into place and painted blue.
5″ convex mirrors arrived.
20th April 2021.
Built brackets for the new side mirrors.
With the convex surface, these mirrors give a much better view and are much less sensitive to any errors in alignment.
The down side, of course, is the vehicles are closer than they seem from the image in the mirror, but the interior mirror is flat, giving an accurate image, and the outsider mirrors are mainly there for reversing and for verifying if a vehicle is accelerating to overtake or not.
58 years of driving without a single collision has given me good grounding for safe driving.
21st April 2021.
Cut marine ply for a fake soft roof.
22nd April 2021.
Tidied the tray area.
Used a new tool bag from Bunnings to keep the jack, stand, wheel brace, spark plug wrench and spare plugs, and a few other tools for emergency repairs.
Charged the battery, vacuumed the interior.
Sorted all of the paperwork for tomorrow.
23rd April 2021.
DPTI Inspection today at Noon!
Passed OK!
40 minutes late starting, about 90 minutes late finishing, but got there in the end!
Then to Service SA for rego at Gawler, now have rego and number plates!
When I am finally a club member, I will swap to club rego for much cheaper running cost.
24th April 2021.
Installed number plates.
Noticed fuel starvation yesterday, going up hills and over 80 km/H.
Suspected blockage at the fuel filter in the carburetor inlet.
Sure enough, the tiny paper filter was full of grey sludge.
Thoroughly cleaned the filter with petrol and compressed air, and inserted a filter in the line near the tank.
Now runs much better!
Removed the steering wheel and rotated 1/4 turn to the right to match the true straight-ahead position.
25th April 2021.
Only 8 months to Christmas and still so much to do…
Jobs to do:
Need to alter wiring on high beam relay so that in high beam, low beam gets switched off automatically.
When both are on for a while, the circuit breaker drops out, killing the engine.
Need to fit a separate circuit breaker for the headlights.
Unfortunately the auto shop was closed for Anzac Day, so another day tomorrow…
Attended the third Valley Hot Rodders meeting, so now an official member.
Thanks given to me for the enormous effort in resurrecting images and pages from the old version of the web site valleyhotrodders.com.au, now setup as valleyhotrodders.com because due to a lapse in domain name renewal, the original domain now goes to a company in Queensland with no relation to Valley Hot Rodders.
Note: A year later, after many discussions and threats of legal action, I successfully managed to reclaim the original domain name valleyhotrodders.com.au and then moved all of the data back to the original site.
26th April 2021.
Another trip to Adelaide today.
Picked up the electrical parts needed.
1st May 2021.
Finally got back to work. Installed the on-off-on switch, wired direct to battery power through a 30-amp auto circuit breaker, eliminating relays and the ignition circuit, as the switch has a 35-amp capacity.
Works perfectly. Just have to remember to turn off the headlights when they are not needed.
At about 55 watts each, we have 110 watts for 2 lights (H4 halogen globes) divided by 12 volts = 9.2 amps, so there is plenty of reserve capacity. In future, I plan to add a headlight reminder to this circuit.
2nd May 2021.
At last, got back to the rich-running carburetor.
Removed the top half, the float assembly, the primary rods and the primary jets.
Replaced the older carby rods with the original rods from the new carby.
Replaced the jets, which appeared to be from the old carby that had about .072″ holes, with new jets with .069″ holes.
Very difficult to replace the rods with the float in place and the hood in place, trying to guide each rod into the jet and at the same time holding down the rod holder against the spring pressure. Very easy to bend the very fine ends of the rods, which must be perfectly straight for correct operation. Finally got everything back together, but disappointed that the engine was running slightly rich still. Just slight black smoke at the exhaust, even with the idle mixture screws wound all the way in.
The true test is on the road, so a warm-up around the block brought up the temperature to 180 degrees where the thermostat cuts in, and the idle was then too fast. Cut back the idle speed, and no visible black smoke was apparent, and the idle was very smooth.
Will do some more testing later to see how it idles when cold. If it is a problem, I may have to connect the manual choke.
4th May 2021.
Engine started cold OK and in a few seconds ran smoothly. After a short run to warm up it was obvious that the engine had never been smoother.
Given that the idle screws were still all the way in for best idle, I decided to go down to .067″ primary jets.
A very fiddly job, so left for another day.
5th May 2021.
Driver’s side door still rattling a little, bent the catch bolt in slightly for a slight improvement.
Adjusted the door height slightly (with a moderate hit in the back of the bottom hinge with a decent hammer) which meant that the door has to ride up on the bear-claw bolt. This made the door shut very well, but to decrease the risk of rattling even more, I bent some aluminium channel to the curvature of the door, then screwed it to the timber in the roof above the door, then glued a piece of rubber insertion about 12 x 3 along the channel, so when the door is shut, the top of the window is pressed out slightly.
Road testing showed no rattles.
From a safety point of view, the rattling means nothing, as the bear-claw catch completely surrounds the bolt, making it virtually burst-proof.
Happy with the way this door went, did the same operation on the passenger door.
7th May 2021.
Another look at the carburetor – in reviewing the various original new carby jets, the old carby jets, and what I had available, I decided to go from .069″ down to .064″ primary jets. Calculating the are of the jet less the area of the needle, this gives a significant 20% drop in fuel flow.
Expecting the engine to idle poorly, I was surprised to see it idle significantly faster on the .064″ jets, even with the idle screws still all the way in. Reduced the idle speed to normal, then found the idle speed improved very slightly with the idle needles screwed out just 1/2 turn. Slowed the idle again and took it on a short test drive to reach operating temperature, and found no problem with the engine performance. No sign of black smoke at the exhaust. No sign of hesitation. Flooring the throttle in neutral still created slight black smoke, but given the huge dump of fuel when the secondaries open, I am not surprised or worried. Tomorrow I will modify the throttle stop so the secondaries should not open at all.
8th May 2021.
Too busy – too many other jobs to complete.
11th May 2021.
Removed the internal rear view mirror, built and painted a longer bracket to hold the mirror lower for a better view of traffic behind.
12th May 2021.
Assembled the internal rear view mirror on the longer bracket, and installed again. Wow! the difference is amazing.
A very clear view of the road behind.
13th May 2021.
Fixed the rear number plate lights.
Were a bit too short to illuminate the number plate, which stood proud of the bodywork due to the spring-loaded flap that opens for the fuel filler cap.
So loosened the nut behind both of these LED lights, crimped a small piece of aluminium channel over the threaded area between the body and the light, tightened the nuts again, and tested OK.
An easy and effective solution.
15th May 2021.
Replaced the T-bar handle that locks the ute lid down.
The previous was a cheap Chinese model, and when one of the keys was lost, the other key could not be copied, as blanks were unavailable.
So an expensive model was purchased and installed, and is obviously a far superior product.
Nice chrome caps for the screws, and comes with 2 full-size keys. Adjustable for clockwise or anticlockwise opening.
Now all we need is a long extension spring to stop the lid from opening on bumpy roads.
17th May 2021.
Found a suitable spring for the ute lid lock, and installed fairly easily.
Glued 10mm foam rubber around the door frames to keep out dust,noise etc and to help prevent the doors rattling.
Used a 30-second instant glue to fix the foam rubber into position, then used charcoal colour silicone to strengthen the bond and retain the position each side of the rubber.
Cut a rectangular hole in the rear quarter panel and inside plywood to house a new venting window.
Partly to open for airflow on hot days, partly to give a better view of traffic coming from the right.
Now need some hinges to pivot the 6mm Lexan along the front edge, and some sort of device to lock the back half of the window to the closed or open position.
20th May 2021.
Changed the Lexan to 3mm to accommodate the rubber seal and the small solid brass hinges used.
Built a frame around the inside , stained and varnished. Completed the window OK.
23rd May 2021.
Had the longest run so far, from Kapunda to the Company Kitchen at Angaston for brunch and a meeting of the Valley Hot Rodders. Great bunch of people. The rod went very well as expected, although the idle was a little rough when very hot, although the temperature never exceeded 185 degrees F which is normal for this engine.
However, a hot restart was unsuccessful, with the engine turning very slowly. Probably for my fault for my habit of pumping the throttle when starting. With timing advance at 10 degrees, I think petrol vapour is igniting before Top Dead Centre, fighting against the starter motor.
Next tune-up day I will retard the timing to about 6 degrees before T.D.C. as long as the idle is not affected. It appears that the idle speed, advance and lean/rich mixture are all related.
After a few minutes to cool down, no problems starting.
24th May 2021.
Pulled all of the spark plugs, expecting to still see some sooting, but found only slight soot on the rim of the plugs, but none on the insulator or electrode, so I am relatively happy with the carburetor smaller primary jets now. Cleaned, gapped and replaced all plugs.
Not happy with the way the left door was closing, but cut away a short piece of rummer seal and silicone, and now the door operates very well.
27th May 2021.
New chrome rocker covers arrived. Installed them with new gaskets,new chrome oil filler, new PCV valve and new stainless studs and cap nuts As the studs were slightly too long, rather than cut them all, used 10mm lengths of stainless tubing, washers and spring washers, which worked out OK.
4th June 2021.
Carburetor spacer arrived, 1/2″ thick, made from plywood with phenolic treatment and does not need a gasket either side. I originally thought that the hot restart was either ignition timing too advanced, or carby running too rich. Thinking about it and researching more, I realised the problem may be fuel boiling in the carby, providing vapour in the cylinders instead of a fine spray. At starting rpm, the vapour would explode before T.D.C and push the piston down and the crank backward.
Now with the 1/2″ wood spacer installed, hopefully this problem will be gone. Also replaced the 2.5″ riser under the air cleaner with a 2″ riser.
7th June 2021.
Perforated stainless sheet arrived. Cut the louvers from the right side hood panel and pop riveted the perforated stainless sheet in place.
Worked out well, giving much better airflow to outside, giving some visibility to the chomework in the engine bay, and prevents accidents touching of hot or rotating objects if a pedestrian gets too close.
8th June 2021.
Repeated the perforated stainless sheet on the left side. Rain and wind today, so no road testing.
16th June 2021.
In the potential need for airflow through the cabin on a hot summer’s day, I decided to install an opening sunroof.
After looking at various sunroof options from wreckers,I decided instead to build my own, using a similar style to the small vent window already installed in the read right side quarter panel.
I had an offcut of 6mm lexan left over from the windscreen installation, about the right size.
At the same time,I was unhappy with the shape of the roof, and rather than rebuilding the entire roof,I decided to install a timber roof over the top of the metal roof.
This would give extra insulation on hot days, as well as giving the appearance of an old vehicle.
First thing was to decide on an appropriate location, then cut the rectangular hole in the roof, then a matching hole in the marine ply roof lining.
Then fabricated some metal strips with flanges top and bottom to sit between the roof and the lining.
17th June 2021.
Installed timber on the back, sides and front of the roof, glues and screwed in place.
The local hardware shop had no marine ply in stock,so I used existing offcuts in two pieces, over smaller offcuts used to pack up the top layer to the correct height.
18th June 2021.
Sanded the new roof, filled holes and gaps.
After the filler dried, sanded again and applied the stain/varnish coat.
The hole in the roof was still covered by the new woodwork.
19th June 2021.
A light sand again, then applied a coat of marine varnish.
This varnish needs 12 hours to dry, so no time to apply another coat (3 recommended) before tomorrow’s hot rod meeting, where I hope to get my first log book for Club Registration.
20th June 2021.
A cleanup this morning, vacuum out the sawdust, etc.
No log book available, but did receive a form for registration that has to happen first.
21st June 2021.
Took the form to Elizabeth, and not surprisingly, the young lady behind the counter did not know the procedure.
With the help of 3 other staff, it was all done.
Before the club rego was issued, the current full rego had to be cancelled.
I said OK as there was only about 3 weeks left anyway.
Received a credit for the remaining rego cancelled, but lost any credit for the insurance.
22nd June 2021.
Now eligible for a log book, but had now cut a hole in the timber roof, and with the Winter setting in, the log book would have to wait.
23rd June 2021.
Started building a frame on top of the sunroof hole, a slow process because of the slight curvature of the roof. This lasted a few days.
27th June 2021.
Used some 3mm marine ply offcuts to line the inside of the sunroof hole.
28th June 2021.
Applied a lot of filler over screw holes and gaps.
29th June 2021.
Sanded the roof and gave it another coat of marine varnish.
30th June 2021.
Busy building the new carport, so no hot rod work done.
2nd July 2021.
Glued rubber foam sealing strip around sunroof opening.
Used a strip of hardwood to mount the sunroof hinges.
Mounted the awning window opener that will open and close the sunroof.
Sealed around the outside of the rubber seal with black silicone.
3rd July 2021.
Still building the carport, slow process in cold wind and showers.
7th July 2021.
Mounted the lexan sunroof.
Now works OK but needs an aluminium strip along the rear edge to close better and prevent leaks.
9th july 2021.
Built the frame around the inside roof to tidy up the opening.
10th July 2021.
Removed the firewall panel to allow access to the electronic distributor mounting.
Adjusted the ignition timing back from 11 degrees to 6 degrees before Top Dead Centre.
Engine runs slower, but this may make hot restarts more reliable.
Adjusted the idle jets to one full turn out, was previously 1/2 turn out.
18th July 2021.
Removed glove box to access the rat’s nest of wiring.
Removed the parking lights from the ignition circuit.
Installed a switch from the main circuit breaker direct from the battery to power the parking lights.
The parking light switch, when turned on, also powers the High/Low Beam headlight switch.
Made it to the Valley Hot Rodders meeting, and finally received the log book, so I can now drive the car again!
20th July 2021.
Wood filler installed in gaps around inside sunroof.
Re-installed glove box.
Engine still starts running rough after idling for a few minutes.
Idle speed adjusted up slightly, idle jets adjusted back to 1/2 turn out.
Bumped up the idle speed slightly more, now idles better without “clunking” when drive engaged.
25th July 2021.
Fixed aluminium angle to rear of sunroof.
Now closes firmly.
29th July 2021.
Picked up a new chrome radiator shell from Rod-Tech.
Nice quality, and cheapest I could find anywhere at $250
30th July 2021.
Removed original radiator shell.
31st July 2021.
Started the modifications to install the new shell.
Shifted the top radiator grille support bracket from the old to the new shell.
Cannot install it until I get some new stainless mesh.
Could have removed the mesh from the old shell, but wanted a slightly stronger mesh with a little more than the 3mm openings.
The old mesh was siliconed into position and did not lie completely flat.
2nd August 2021.
A trip to WEMS in the Barossa Valley. A steel supplier specialising in stainless steel products for the wine industry.
A nice product with vertical slots, but at $250 for the minimum half a sheet, 900 x 900, too expensive for my shoestring budget.
So opted for some stainless welded mesh at $70, but a big mistake.
Cut to size and siliconed it into the new grille shell.
3rd August 2021.
Silicone set, but on installation found that the mesh was too thick and fouled on the radiator before the shell could be mounted.
$70 down the drain.
Ordered some mesh from eBay at $55. If only I had forked out the $250 for the nice slotted mesh it would have been installed and running.
8th August 2021.
Waiting for the new mesh to arrive, looked at the rear coil-over shocks that required adjusting.
Last time I looked at this, the left side was so tight I could barely move the main adjusting collar.
This time I built two c-spanners, one for the adjusting collar, and a slightly smaller one for the locking collar.
The C-spanners worked fine on the right side, but it was nearly impossible to move the adjusting collar on the left.
Removed the entire coil-over shock and set it up in the vice.
Tried various lubricants, best appeared to be auto transmission fluid.
Managed to move it half way up the adjustment using my super-large multi-grips on the collar, with a 900 long pipe on the handle.
Assembled everything, removed the props and now the car sits about 20mm higher, with a little more travel available in the shocks.
Enough for one day.
9th August 2021.
Still waiting for the mesh, so sanded the engine covers and resprayed them, but still using the old paint that had a bit too much turps in it, and had 2 small runs.
These should sand down and be OK for the final whole car respray.
10th August 2021.
Received the new stainless mesh.
Woven wire, 5 wires per inch, 4.5mm hole.
Cut to size, siliconed into place, left to cure overnight.
11th August 2021.
Installed the grille shell, glued the rubber strips for the engine covers to sit.
When re-installing the engine covers, found it was not fitting correctly around the shell, with a big gap around the top right side of the grille.
The front centre cover support was riveted in (steel rivets) about 5mm to the left of centre, so drilled the rivets and moved to the right by about 8mm.
Rather than use rivets gain, used 5mm bolts and nuts.
Now the engine covers fitted much better, except that I had moved the support a little too far,now with a small gap around the top right side.
Would fit better if I move it back nearer the centre by.about 2 to 3 mm, but will do for now, as the gap is not that noticeable, and will negatively affect the alignment of the side covers.
12th August 2021.
Sanded and painted the cover I had built to fit in front of the grille.
13th August 2021.
Fitted the front cover.
15th August 2021.
Drive through Williamstown and One Tree Hill with the Valley Hot Rodders.
Some faster,tighter cornering resulted in slight touching of the front tyres on the fenders.
No significant damage to the tyres or fenders,but need to look at this.
Engine running smoothly.
20th August 2021.
Started to increase caster and build negative camber on the front wheels.
Brought the tyres inside the fenders, but need some road testing.
27th August 2021.
Started building a sway bar for the front suspension.
This should reduce body roll and help keep the fenders away from the tyres on corners.
2nd September 2021.
Sway bar completed after obtaining some female right hand thread 10mm x 1.25 pitch rod ends for the sway bar links.
8th September 2021.
Test drive to Riverton and return.
Fairly rough road and big bumps made the car difficult to steer.
Appears to have way too much toe-in which would explain the steering issues.
9th September 2021.
Reduced the toe-in but no time to test drive.
10th September 2021.
Test drive – sway bar works well, and now drives very straight s it did before, but more careful measurement indicates still too much toe-in.
To measure toe-in, I use 2 lengths of 100×100 steel RHS, 2 each side.
Bottom section each side of front wheels, top section hard up against the tyres, pointing for ward.
Measuring the width directly in front of the tyres and again about 600mm forward gives a rough indication of toe-in or toe-out.
However, after jacking the front enough to work underneath, the wheels are hanging down, distorting the measurement.
Dropping the car to ground level still incurs errors unless the car is driven to let all suspension parts settle,then drive straight into the workshop and measure again.
Finally reached a very close slight toe-in with car driving very well.
14th September 2021 Switching to the Ssangyong Actyon
Our other daily driver car, a Ssangyong Actyon dual cab ute, developed a hole in the radiator, and also the engine cut out when it reached normal operating temperature.
When cool, it would start and run fine until it warmed up and then died.
I suspected it would be a sensor, but first the radiator had to be fixed.
No time for anything else as I had to get the Ssangyong running again as our main transport.
First, had to remove the old radiator, no easy task.
3 devices in front of the radiator; the air conditioning condenser, the intercooler, and the twin electric fan.
Took a long time to remove lots of bolts, pry the plastic front panels forward to get enough room.
Had to move the oil cooler pipes at the bottom to allow the twin fan unit to come out the bottom first with a lot of juggling.
Then came the intercooler, a little easier.
The air conditioning condenser was harder as I did not want to lose the refrigerant.
Then the fan shroud, again very difficult.
With all of the radiator bolts released, and a lot of juggling between the radiator and condenser, the radiator came out.
This procedure took two full afternoons.
A closer look at the radiator core – obviously not repairable, so a new one was ordered from eBay.
19th September 2021 – back to the Hotrod
On the way to the Valley Hot Rodders meeting, the hot rod started starving for fuel, and eventually cut out.
Kept switching the electric pump on and off many times and eventually got enough petrol in the carby to get back home.
Removed the fuel filter from the carby inlet.
It looked fine, but could not blow through it, so re-assembled it all without the filter.
Engine appeared to run fine, but need to road test in the morning.
No other transport as the Ssangyong Actyon ute still out of action.
20th September 2021 – back to the Ssangyong
The Ssangyong radiator arrived, and work started installing it.
I now knew better how everything went together, so by the end of the day, the radiator and other pieces were all installed.
However, on filling the system with coolant, it was leaking out as fast as it was going in.
It appeared to be leaking around the plastic tank, so out the radiator must come.
Another job for tomorrow.
21st September 2021.
Removed the radiator.
To my horror, I found a perfectly round hole in the plastic tank where a slightly too-long bolt had punctured it!
What a crazy idea. Every bolt except 2 did not matter if it was too long, but these two bolts that held the right side of the twin cooling fans went into nuts captive in the front of the tank.
This means that if a bolt was about 10mm longer than the shortest bolt possible, it would puncture the tank behind.
Anyway, I remembered I had some magic “welding powder” in the fridge that had been there a long time.
I had used this before on other projects and it was very successful, so I used this to repair the hole.
This time, it was not hardening as fast as it should, so left it until morning.
22nd September 2021.
To my surprise, the repair had hardened extremely well, so I filled the radiator and found no leaks.
So back in the radiator went, except that this time, I measured all bolts and worked out which ones to use.
After running the engine for a while there appeared to be a very small leak at the repair location, so I used some stop-leak in the radiator and this appeared to fix it.
We could still only go on short trips as the engine would die after driving for 10 minutes from cold.
Eventually, the leak appeared again and got gradually worse, until it got very bad, and the radiator had to come out yet again.
23rd September 2021.
Ordered yet another new radiator.
27th September 2021.
New radiator arrived, and carefully installed.
A few short trips and no leaks.
30th September 2021.
Took the SSangyong to the workshop where they had a better code reader.
No faults found, so left the engine running until it predictably stopped, then found the problem – the crankshaft positioning sensor.
Ordered a replacement from Ssangyong, they quoted 7 working days but they had one the next day.
Another long drive in the hot rod to pick up the sensor, about $90.
Difficult to get at this sensor, at the rear of the engine block just above the starter motor.
You can see the wires from the top, but not the sensor.
Jacked it up again, and from the bottom it is very hard to get at, especially when all the 4WD stuff is in the way.
Need an allen key to undo the single screw holding it in, it then slides out easily.
Replaced the sensor, reconnected the wiring, and the engine starts OK.
Left it idling for a long time after it reached operating temperature, no problem.
Turned it off, re-started with no problem.
Drove it around the block a few times, no problem, so the sensor was the definitely the issue.
4th October 2021 – Back to the hot rod again
I wanted to lift the front and rear suspension to gain some front wheel clearance as well as get a better ride over bumpy roads.The front suspension is HT Holden, but the springs are FB Holden.
I ordered some KING Springs KHFS02 that are correct for HT Holdens and installed these, with an immediate lift of about 45 mm which was slightly more than expected, but happy with it.
To the rear suspension – LC Torana using coil-over shocks.
I had previously attempted to adjust these, but the left side was so tight that it was nearly impossible to move the adjustment collar.
However, I had recently found an old pair of multi-grips that had a length of chain instead of regular jaws, and this was perfect for the job.
Along with a length of pipe on the handle, and the rear jacked up to reduce pressure, I was slowly but surely able to wind the collar up to almost the maximum height.
Same with the other side.
Now the whole car sits very level at a comfortable height.
Of course, with the tie rods sitting at a slightly different angle, the toe-in needed adjusting again.
5th October 2021.
Some road testing proved that the ride was much better, the sway bar was working well with almost zero body roll.
10th October 2021.
Replaced the fuel filter, under the car at the back near the tank.
The old filter appeared OK, but just wanted to be sure.
17th October 2021.
Off to the the Valley Hot Rodders meeting at Angaston this afternoon.
A warmer day than we have had for a long time, and travelling a little faster than normal.
Normal speed was 80 km/hour but the car was handling so much better I was now running around 90 km/hour (100 zone).
All was well until we arrived at Greenock, where the engine died.
Sounded like it was starving for fuel.
Removed the fuel line from the carby and placed the hose into a bottle, however although the pump was working, only a tiny dribble was coming out.
I thought that the fuel pump, although making clicking sounds, was not functioning correctly and was fairly hot.
After much thought and tinkering, tried again and now had better fuel flow.
So connected the fuel hose again, and the engine started OK.
As the club meeting was now over, decided to head back to Kapunda.
Travelling slowly at 60 km/hour, made it OK with no further problems.
Looking at the problem in the shed, noticed that the fuel cutoff valve was extremely hot, so did some further checking.
Found the specifications for the valve, maximum allowable temperature is 80 degrees C.
But the hot rod thermostat is 180 degrees F (82.2 degrees C) and on a warm day the engine temperature goes to 195 degrees F (90 degrees C).
The engine is a tight fit in this body, and everything in the engine bay gets very hot, with even higher heat coming from the exhaust manifold.
I knew from experience that solenoid coils lose their magnetic properties at high temperatures.
These valves are normally closed, and to operate correctly, they rely on:
(a) 12 volts being available when the ignition is on
(b) The controller able to detect pulses from the tachometer (to prove that the engine is running).
So any part of the system may be failing: The cut-off valve, the controller, the pump, the tacho signal, the wiring, the power supply, the circuit breaker.
18th October 2021.
My solution was to build a large bracket, install the pump, electronic controller and cutoff valve on the plate, then mount the plate under the tray at the back near the tank.
This seems to work well, yet to be road tested.
21st November 2021.
Travelled to this month’s meeting of the Valley Hot Rodders with no problems.
Told the members I had cured the problem.
On the road home again, never missed a beat, but about 200 metres from home, same thing, engine died, no fuel in the carby.
My initial diagnosis: Failure of the safety cut-out, or the controller, or the long wiring back to the front, or even the fuel pump.
To get us home, I by-passed the cut-out valve.
Engine starts and runs! Got home OK
22nd November 2021.
Not knowing for sure which component was responsible, and my dear wife claiming she will never ride in this vehicle again, I had to truly resolve this.
Ordered a new controller, valve, fuel pump.
25th November 2021.
While waiting for parts, decided to respray the entire vehicle.
Filling holes, rubbing down, masking up was a long and tedious job.
Eventually managed 2 coats of blue auto paint from Crystal Paints.
Not happy with the finish, this paint uses turpentine as a thinner.
Too thin and the paint runs too easily.
Not thin enough and the finish is poor.
Resprayed some panels several times after too many runs.
Tried spraying outside but too many flies and other bugs were sticking everywhere.
Continued back in the shed but not enough light to see what I was doing but got another coat on with some runs.
1st December 2021.
Ordered parts for a remote oil filter, engine oil cooler, AN10 stainless braided hoses and many fittings.
Still waiting for the last fittings to make it all work.
12th December 2021.
The new fuel pump came from Sydney, and the supplier delivered it to the Post Office the next day.
And it sat there. “Received and ready for Processing” so eventually I submitted a report to Australia Post.
Their reply “Will let me know the results of the investigation by 23rd of December 2021” which is not much help.
So I proceeded to set up the old fuel pump and the new cut out valve on a plate fixed just in front of the fuel tank and behind the rear axle.
Drained the tank so I could connect the fuel pump, but before connection, I wanted to start filling the tank to check how much fuel would have to go in before it ran out the outlet.
It required around 10 litres to start the flow, so obviously the pickup location in the tank was too far off the floor.
Checked the fuel gauge and it read quarter full.
So time for a think about this.
Last time we had problems 200 metres from home, the tank level was getting low.
We were also climbing a long hill, and the road had considerable camber, so the remaining fuel was moving to the rear and to the left of the tank.
The fuel pickup is in the front and right of the tank.
Could we simply have run out of fuel?
Probably not, although the gauge indicated somewhere between half and quarter full, so getting close.
Also when I routed the fuel line by-passing the valve, the engine started and ran well.
However, at the time, the fuel filter was close to the tank, and the fuel pump and valve were just forward of the rear axle.
These inline, low pressure pumps push fairly well, but are bad at sucking.
Worse, the pump had to suck through the filter, then through a 8mm hose that had to run from the tank pickup, over the rear axle to the pump.
When it failed, there may have been some air in the line between the tank and pump, as the section of road was very rough.
So in revising the new setup, the line now goes from the tank directly to the pump, which is mounted level with the bottom of the tank.
So nothing stopping the pump from sucking fuel, then easily pushing the rest of the way.
First, through the cut out valve, then over the rear axle.
Then through the filter, then to the Rochester carburetor.
15th December 2021.
This system has been working well, but only on relatively short runs.
22nd December 2021.
Replaced the ribbed rubber tread on left side running board.
The original was too short and was not perfectly flat as I did not have enough adhesive in the middle areas.
30th December 2021.
Set up the remote oil filter (Z9), installed the new stainless braised hoses and AN10 fittings.
What are AN10 hoses?
AN is from “Army Navy” and 10 is the hose diameter in 1/16″ so 10/16″ = 5/8″ diameter.
Because the in/out connectors are so close together, it was nearly impossible to tighten the fittings properly.
Did not have an open-end spanner large enough, but a spare 7/8″ open end spanner was ground out to size
Engine started OK and had oil pressure in a few seconds.
No leaks so far. Ran until operating temperature, revved engine to build oil pressure, still no leaks.
31st December 2021.
Next stage: connect the oil cooler.
Used 2 x AN10 Male-Female adapters with a 1/8″ NPT gas thread.
Screwed in some 1/8″ NPT x 3/8″ tails, ran 3/8″ multi-use hoses back to the engine oil cooler under the floor.
Again, started the engine, built oil pressure OK, but oil level down a bit after filling hoses, oil cooler, etc.
2nd January 2022.
A new year, hopefully better than the last, although that is what I said then year before, so not quite so optimistic…
Purchased another 5 litres of Penrite 40/70 oil, topped up the engine.
3rd January 2022.
Replaced the ribbed rubber tread on right side running board.
Used a different technique this time.
Placed the rubber strip on the running board, folded over the rear end carefully without disturbing the location of the front end.
Brushed on the contact cement, running board and strip on rear half.
Touch dried very fast. Very hot day, both garage doors open for ventilation.
Carefully positioned the back half and pressed down all over.
Placed some boards and weights on the freshly fixed section, then folded the front half back over the back and repeated the process.
Ended up perfectly positioned again.
More boards and weight to hold everything in place.
Tomorrow I hope to take it for a run to get the oil very hot and check for leaks, but there is a small chance of rain.
Windscreen wipers are in the toolbox, but I would rather not risk going out in the rain.
Plenty more sunny days this summer!
4th January 2022.
Removed the weight on the running board, but disappointed in that there were several bubbles in the rubber strip.
Will have a think about how to get some glue into each of these bubbles without starting again.
5th January 2022.
Not happy with the small clearance of one oil hose to the engine fan.
Although the engine mounts appear very solid, I do not know how much movement there is under high engine torque.
So I modified the hose location again, using some AN10 M-F adapters, but it ended up looking untidy.
Also made it even more difficult to tighten the connections effectively, and one connector had a small leak.
Started from scratch, replaced the 45 degree hose ends with 90 degree hose ends and eliminated the adapters.
The result was a much neater assembly and no leaks.
7th January 2022.
As Australia Post finally admitted that the new fuel pump was “lost in transit” the supplier was good enough to send me a replacement free of charge.
The new pump arrived today, so this was the next job.
The new pump was a similar style, but came with a small pre-filter to stop large rubbish from entering the pump.
Fitted OK, and was much quieter than the previous pump, but just loud enough to hear running.
Still raining, so maybe tomorrow for a test drive.
8th January 2022.
Road testing OK. Later completed a run to Riverton and back with no problems.
23rd February 2022.
After a long time out of use (no club meetings due to CIVID January and February) we drove to Lil’ Mos for coffee, but the engine died as we were parking.
Again, the carby had no fuel.Attempted to divert the fuel line around the cutoff valve, but in attempting to remove the line from the fuel pump, the barb fitting came out of the pump.
This barb fitting appeared to be a steel fitting simply pressed into the aluminium pump housing and extremely short.
This is a stupid and dangerous design, with the fuel tank now emptying on the road, but managed to press the barb back into the pump hard enough to stop the leak.
I still had the old pump at home, so a long walk home to get our Ssangyong ute, the pump, tools etc and then back to replace the pump.
This time, using a clamp on the fuel hose from the tank, the pump was replaced and the hoses routed around the cutoff valve.
Presto: Engine fires up OK, so started the trip home, but half way there the engine died again, no fuel in the carby once again.
This time I removed the input line and took the off the quadrajet, but could not see a problem.
Switching on the pump again, the carby filled OK, so put everything back together and once more the engine ran fine and got home with no problems.
The another long walk to get the other ute to drive home again.
By this time I had had enough, clothes and skin had been soaked in petrol, so a hot shower and change of clothing was in order, the quit for the day.
24th February 2022.
Had to fix this once and for all. Something was obviously blocking the carby, so disassembled the carby including the floats, needle etc and could now blow out many of the passages with compressed air.
Still no problems found.
As I had previously removed the original tiny filter in the quadrajet, I found this and replaced it.
Blew out the fuel line along the entire length.
Removed the metal filter that was installed after the cutoff valve and blew it out. No debris evident and appeared to have no restriction before or after blowing out.
Installed a 3-way tee with taps and another tee to enable an easier way to resolve any issue with the cutoff valve.
This way, simply opening one tap would bypass the cutoff valve if another fuel supply issue happened again.
I also placed a transparent plastic filter between the tank and the pump so that I could routinely check for debris coming from the tank.
I did remember that the cutoff valve had a a fairly small hole to allow fuel through, I think only about 2mm diameter that would restrict flow.
The pump was rated at about 4 or 5 psi pressure, and I have seen reports that pressures over 5 psi have caused flooding issues with quadrajets.
So my next thoughts What about the pressure drop?
First through the plastic filter, then after the pump, through the small hole in the cutoff valve, then through several metres of 8mm (5/16″) hose, then through the carby filter.
I noted that this time and one other time the engine had cut going up a short hill, where the pressure drop would have been aggravated.
In any case, another test drive would be in order now, first, with the bypass around the cutoff valve.
Drove around Kapunda, including runs on 100 km/hr roads, up hills, on rough roads, at slow running, with engine hot (up to 200 degrees F, a 32 degree C day).
I did note that only once in a half hour drive, the engine faltered for just a fraction of a second but did not stop. This appeared to be more like an intermittent electrical fault that I should look into.
Maybe I should look into providing an extra switch and wiring to supply voltage directly to the electronic distributor in case of an emergency.
This cannot be left permanently because it would bypass the circuit breaker, ignition switch and the neutral start switch, but may help diagnose any interruptions to power.
Switched back to normal operation through the cutoff valve, to road test another day.
26th February 2022.
Had some varnish out for another job, so gave the wooden roof another coat.
As a test, gave the tailgate a brush coat of varnish, which worked out surprisingly well, considering it was a very poor quality brush.
Although I had some spray-on clear coat duco, this may have interacted with the blue Crystal paint.
I will try some more varnish elsewhere after I get some better brushes. Not sure how the varnish would spray, but may give this a try.
1st March 2022.
Decided to keep varnishing the entire car. Fairly happy with the result.
A few runs, not very noticeable.
Brush marks showing in many places as it was fairly hot and I could not brush fast enough.
3rd March 2022.
Road tested to ensure that the cutoff valve was working OK. Not a long run, but all appears OK.
Still worried about the fuel pressure through the very small hole in the cutoff valve and the number of filters and length of 8mm ID fuel hose.
16th March 2022.
Installed a 15 psi fuel pressure gauge.
Seems to work OK.
Considering that much of the fuel line was empty after installation, I was surprised to note that I had to switch on the ignition many times for the short few seconds burst (before the cutoff valve closes) before any pressure started registering on the gauge.
Eventually I had some pressure, but still had to go through the sequence several more times before the pressure rose to about 3.5 psi and steady.
Engine started well then. 2 pumps of the throttle with choke out, no problem.
Still need to road test and keep one eye on this gauge.
17th March 2022.
Tried using some clear duco I had sitting in the shed for years.
Not successful as it was bubbling some of the varnished areas, so this small test area had to be sanded back to bare metal and started again.
Yet to try some diamond finish another day.
21st March 2022.
2″ Tachometer arrived today.
Not sure if it will work as it was showing 3,000 RPM straight out of the box.
22nd March 21022.
Installed the tacho but not sure if it will work.
Switching on ignition, the needle goes to 8,000 rpm and back to zero, assumed this is a startup test.
Starting engine, tacho reads 5,500 rpm, slightly more revvs goes to 8,000 rpm.
Pressing the button at the rear does nothing. I assume it is supposed to change the reading for 1,4,6 or 8 cylinder engines but no instructions came with the unit.
25th March 2022.
Road test today, run to Riverton, no problems evident.
Left front fender (mudguard) had a few funny spots in the finish, so sanded them with 600 grit paper and re-coated with varnish, improved the finish OK.
27th March 2022.
Valley Hot Rodders club meeting again, a short trip of 60 km, worked out fuel consumption at 10.2 miles per gallon, or 27,6 litres per 100 km, not too bad for this old technology.
A lot of extra fuel used in workshop testing to attempt resolving the tachometer issues.
1st April 2022.
Ordered a pack of 5 voltage regulators. I will use one to give the tachometer a clean 12 volt power supply.
Then I will use my oscilloscope to check how clean the tacho signal is, coming from the electronic distributor.
I suspect this is a dirty signal with some high voltage spikes and will have to clean up this signal, possibly with a schmitt trigger using a 555 device, but this may not have enough bandwidth.
20th April 2022.
Finally had time to install the 12 volt regulator in the power supply circuit to the tacho.
Failed to make a difference.
No posts for a while due to very few outings over Winter, and no problems…
Oops – I spoke to soon!
30th September 2022.
Engine died from lack of fuel on the way home going up a hill, exactly the place where is died once before.
Fuel tank level was a bit low, but still pumping fuel.
Removed the fuel line from the carburetor, place line into spare bottle I carry for this purpose, and reasonable flow with ignition on (electric pump running).
Removed the big nut holding the inbuilt filter in the carby, removed the filter.
No sign of any debris in the filter but on the attempt of blowing through it, it was completely blocked.
Reassembled everything without the filter, and the engine roared back into life…
After getting home, I inserted a universal plastic filter in the fuel line just before the carb inlet.
This is in addition to the existing plastic filter between the tank and the pump, and a metal filter just after the pump.
I know that it is better for flow to place the filter after the pump, but I wanted to protect the pump from any rubbish from the tank.
Although the engine runs fine now, I was concerned about the high temperature in the engine compartment, often over 200 degrees F in hot weather, so I have ordered some metal case fuel filters to relace the plastic filter next to the engine.
I will leave the plastic filter by the tank as I want to see how much dirt it is trapping.
On recollection, at times when the engine died from lack of fuel, removing the line to the carby and re-installing it resolved the problem, albeit temporarily, and I now believe that a little backwash as the filter was being emptied allowed some flow through the filter again.
A message to all people with a rochester carby – throw away the internal filter, and use a metal case filter right next to the carburetor inlet.
December 2022:
Fitted the new steel-case fuel filter close to the carburetor on a short piece of 8mm hose.
Unfortunately I had orderd 10mm filters, so was a very tight fit but installed OK.
However, eventually the engine died once more going up a steep hill near home, exactly the same place it had died before.
Dismantled the carby fuel intake and found small pieced of black rubber.
The only place the rubber had come from was the short piece of hose between the filter and carby, no doubt because of the over-tight filter fitting that damaged the internal rubber in the hose.
The rubber pieces were obviously blocking the small hole entrance to the needle and seat.
Ordered another filter, this time an 8mm version but with a glass section so I could see any debris that it was catching.
January 2023:
Set up the new filter, but no time to test run.
Used what little time I had to build a sliding window on driver’s side, also a wind deflector driver’s side.
If that works I will duplicate on the left side.
February 2023:
Still working in Adelaide every day, not much else happening.
So many other projects and so little time to updated this page.
However all fuel delivery problems are resolved.
Many outings with the Valley Hotrodders with no breakdowns or issues of any kind although less in Winter with dark and rainy days.
November 2023:
Little tidy-up jobs here and there, but generally very reliable now.
December 2024
No problems this year, very reliable.
I have been a health researcher for 15 years, with excercise and a healthy diet and supplements.
Fairly lean and strong and healthy for my age 77 – no colds, no flu, no COVID,
But out of the blue – a cancer diagnosis.
Lots of trips to Lyell McEwin Hospital for consulting, surgery, radiation (but I flatly refused chemo) and checkups.
Decided to put the hot rod up for sale.
I love this hot rod. 50 years ago I built hot rods for others but could never afford to build my own.
I still have a mortgage on my house that I would like to clear, but unless I get a good offer I will keep the hot rod for enjoyment for many years.
To be continued….
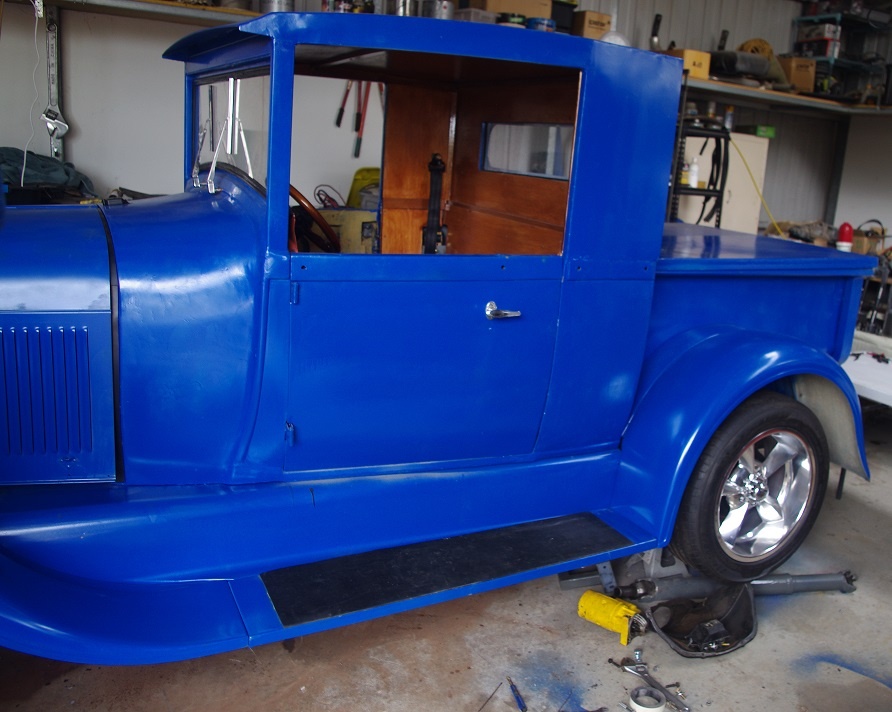
Photo of partly built hot rod, still on blocks and waiting for the rebuilt transmission to be installed.
The original doors and the body have been extended lengthwise by 150 mm because originally the body was so small I had a lot of difficulty just getting my 6 foot frame into the car.
The previous owner who had partly built the car had chopped the roof, but this also made the driving position very cramped, so the entire roof structure was rebuilt higher and longer to match the 150mm longer body and doors.
As a youngster, I helped my father as he spent many weekends panel beating accident-damaged cars for extra income. That experience helped me build some compound curves in extended doors, etc.
Pity he died before his time from Alzheimer’s.
Knowing what I know now I could have saved him, but at least I have managed to halt the degradation in my poor brain now before it gets too bad.
All the more reason to get this project finished!
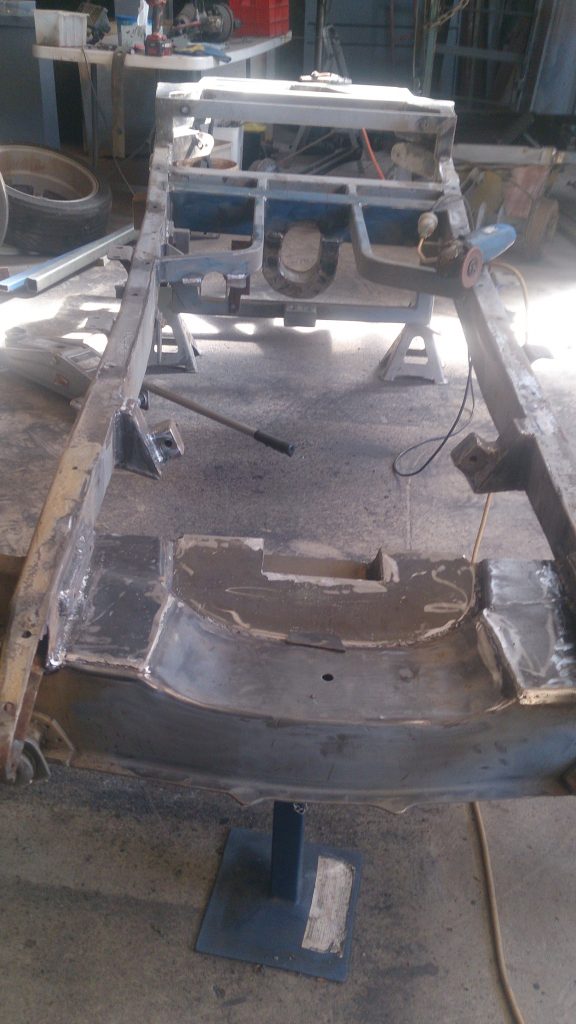
Chassis boxed with 5mm plate – gets heavier every day, but is not meant to be a race car…
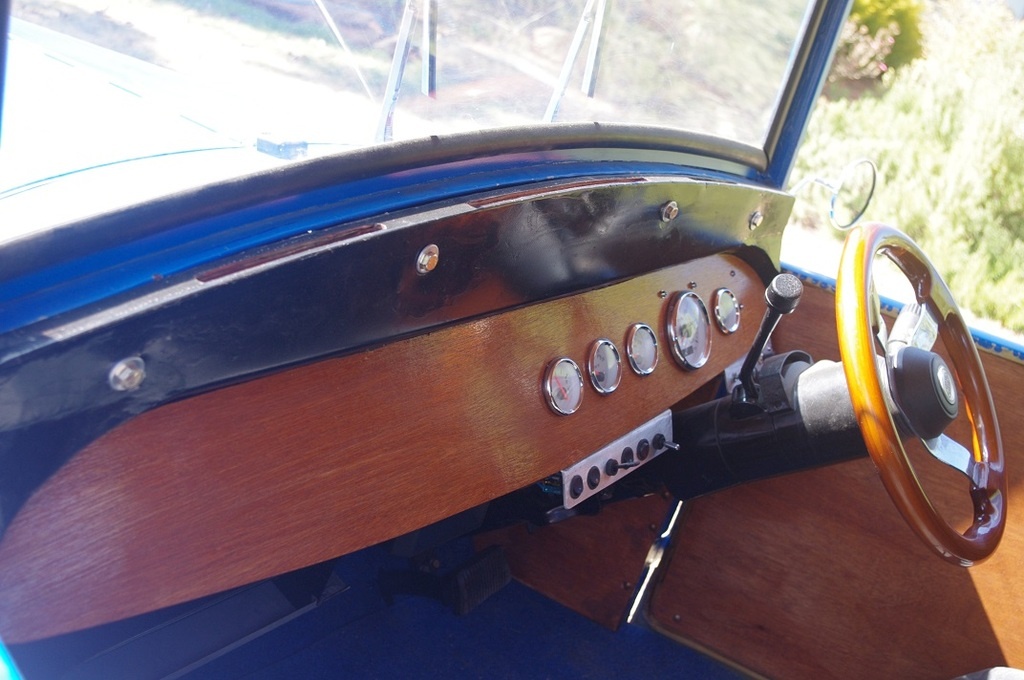
GPS speedo, now tested OK. Cannot find the satellites in the shed, as expected.
Other gauges work OK, except the fuel level is in reverse – shows full when empty, empty when full.
A trap for old players – I purchased a fuel gauge that expected a 90 ohm resistance, so I measured the sender unit that went from something small to around 90 ohms, so this must be right?
Yes, but we should always check which way the sender has to be set up to get the gauge to read correctly!
Marine carpet used on floor.
Marine plywood used for interior lining, varnished.
Basic specifications:
Chassis:
Original 1929 Model A Ford chassis, boxed with 5mm plate, new cross-members, tailshaft loop, custom kick-up at rear.
Body:
Original steel main body, lengthened 150mm to match longer doors.
Roof hand-made, rear panel hand-made, ute tray hand-made.
Front and read mudguards fibreglass.
Front Suspension:
HT Holden independent front suspension, new hubs, ventilated disks and PBR calipers, new PBR master cylinder and booster mounted under-floor, new custom adjustable proportioning valve.
New steering rod ends, KING front springs, new shocks.
Steering column:
HQ Holden. Custom steering universal joints, rebuilt and shortened VB Commodore rack and pinion steering.
Rear Suspension:
UC modified Torana rear suspension and rear axle, new custom coil-over shocks, new brake drums, shoes and cylinders, new brake lines everywhere.
Engine:
Holden Statesman HQ series 308 V8, 060″ overbore, new pistons, rings, main and big end bearings.
New Quadrajet look-alike 4-barrel carburetor. These have smallish primary bores and large vacuum-controlled secondary bores.
At high rpm on the road, you really know it when the secondaries kick in but I nnormally only drive at legal speeds on the primary bores.
Transmission:
Holden made Trimatic auto from HQ series Holden.Completely rebuilt with new clutch plates brak, sprag cluth, seals and bushes.
The Good Old Days
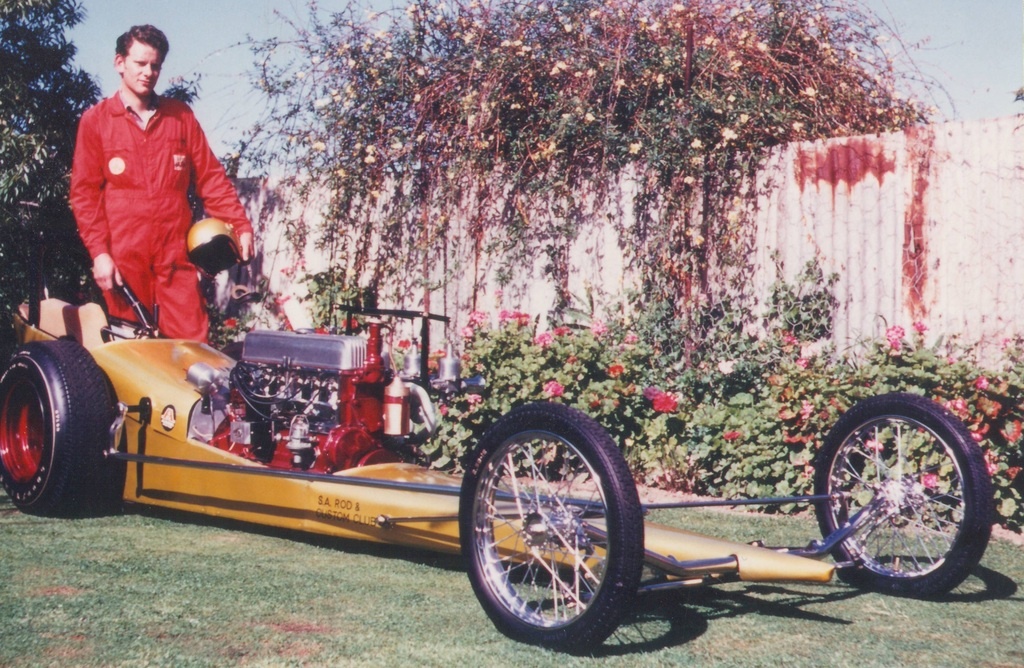
My dragster, around 1970, awarded “Fastest sideplate Holden in the world” by the SA Rod and Custom Club.
Class D dragster at the time, recorded 10.02 seconds at 1/4 mile Adelaide International Raceway.
Early Holden 6 cylinder grey engine, 13:1 compression, straight methanol, 3 x SU carburetors modified for methanol injection, full race camshaft, Holden gearbox running 2nd and top gears only, custom flywheel and clutch.
Later rebuilt with Holden 186 engine, later again with Chrysler 265 Hemi engine.
The stronger valve springs in the 265 engine were too much for the timing chain/sprocket, so this was changed to a gear camshaft drive, using an idler between the gears to turn the camshaft in the right direction.
The straight-cut gears made more noise than the exhaust, but worked very well.
Many of the old rodders still remember this car.
If I was starting again in drag racing today (and I am certainly not) I would do many things a different way.
The first thing would be to increase the ground clearance to make loading/unloading from the trailer a lot easier.
To be continued…